
Table of contents
Yamaha cowling replacement starts with identifying your engine and checking what is actually damaged. A broken latch or worn seal may be available separately, saving you from buying a complete cowling. If the shell is damaged, inspect its mounting points and sealing edge before deciding what to replace. Match the full engine identification and current OEM part number before ordering.
Quick Answer
Identify the engine first: use the identification label on the engine, not the horsepower decal on the cowling. Record the full model designation, serial number, and production date.
Cowling cover ≠ engine cowling. A fabric cowling cover goes over an existing rigid housing for protection. It cannot replace a missing or damaged shell, latches, or seal.
Latches, seals, and vents may be available separately. Check the parts diagram for both the top and bottom cowling before assuming a complete shell replacement is needed.
A seal replacement for some F-series models is directed to a Yamaha dealer. Follow the service guidance for your engine.
If the cowling will not seat evenly or a latch needs unusual force to engage, resolve that problem before operating the engine. A loose cowling can come off at speed.
Engine Cowling vs. Cowling Cover: Know Which Part You Need
Engine cowling: The rigid housing around the engine. The removable upper section is usually listed as the top cowling; the bottom cowling is a separate part of the housing.
Cowling cover: A fabric accessory that fits over the existing cowling for storage or transport protection. It cannot replace a missing or damaged rigid housing, latches, or seal.
Check the product description as well as the photo. A listing for a cover, a bare cowling shell, or a complete assembly can describe very different purchases at significantly different prices.
Diagnose the Damage Before Ordering Parts
The finding from your inspection should guide what you look at next and whether a complete replacement is needed. Use this table as a starting point.
What you find |
What to inspect next |
Replacement decision |
Faded paint or peeling graphics |
Shell condition, sealing edge, and attachment points |
Consider cosmetic work if the underlying cowling is structurally sound. |
Cut, loose, or damaged seal |
Seal seating and the surfaces it contacts |
Look up the correct seal for your model. Have damage assessed before replacing the whole cowling. Some F-series models direct seal replacement to a Yamaha dealer. |
Broken latch or hook |
Both sides of the latch mechanism and its mounts |
Separate hardware may be enough if the mounting points are intact. Inspect the corresponding catch, especially if the latch was forced. |
Cracked shell or damaged mounting point |
Inside and outside of the damaged area |
Get a repair assessment. Replacement may be needed to restore fit and retention. A mounting-point crack deserves more attention than its size suggests. |
Water inside the cowling |
Fit, seal condition, and possible water-entry routes |
Find the entry point before deciding which part to buy. Water inside does not, by itself, identify the seal as the cause. |


How to Identify the Correct Yamaha Cowling by Model, Year, and Part Number
Start with the identification label on the engine, not the horsepower decal on the cowling. Photograph the complete label and record the full model designation and serial information. An older cowling may already have been replaced or repainted, so its graphics are only a clue – not a reliable identifier.
Yamaha also uses production date information to identify engines. Record the manufactured date where shown. Use Yamaha’s outboard serial-number guide if you need help locating or reading the labels.
The boat’s model year alone is not enough to select engine parts. For a Yamaha 150 cowling replacement, “150 hp” leaves too much unanswered. Yamaha has produced many different 150 hp engines across multiple generations, each with its own cowling, latch hardware, and seal. Use the complete model designation and applicable production or serial range to open the correct parts diagram, then find the top or bottom cowling entry and check its notes, finish, and current OEM part number.
If an older part number has been superseded, ask the supplier to confirm the replacement number and verify that it applies to your engine. A similar shape, matching color, or a seller’s statement that it “fits a Yamaha 150” is not enough to resolve an uncertain application.
Note on suffix designations
Yamaha model numbers include letters and suffixes that identify engine variants, production years, and regional specifications (for example, F150D, FL150D, F150F, F150XB). Two Yamaha 150 hp engines with different suffix codes may use different cowlings, latches, seals, or sub-components. Always use the full model designation – not just the horsepower number – when searching for replacement parts or confirming fitment.
When a Cracked or Damaged Cowling Needs Replacement
Look at both sides of the damage. A scuff in the finish is different from a crack through the shell, and a small damaged area around a latch mount deserves more attention than its size might suggest. Check the lower edge, attachment points, and nearby hardware as well as the visible mark.
Useful observations to have ready before requesting a repair quote:
- Does the damage extend through the shell?
- Is a mounting point broken, loose, or previously repaired?
- Does the edge still sit evenly against the mating cowling?
- Can every latch engage normally without forcing the housing into place?
These observations help a dealer or repairer assess the cowling. Repairability depends on the material, location, and extent of the damage. Ask whether the proposed repair will restore the mounting and sealing surfaces, not just the outside finish.
A replacement upper cowling will not fix a damaged catch or mounting area on the bottom cowling. If the bottom cowling is involved in the fit or latch problem, both assemblies need to be assessed.
Latches, Seals, Vents, and Insulation: What May Be Replaceable Separately
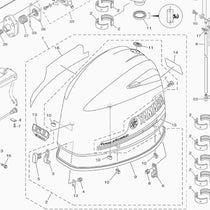
Open both the top- and bottom-cowling parts diagrams. The hardware you need may be listed with the mating assembly rather than the removable cover. Yamaha’s 2008 F150 parts catalog, for example, lists hooks and dampers in the top-cowling group, with seals and clamp mechanisms in the bottom-cowling group. That is a model-specific example, not a parts list for every F150.
Latches and mounting hardware
For Yamaha cowling latch replacement, identify the damaged piece before ordering. A handle, hook, spring, bushing, and mounting plate are not interchangeable descriptions of the same component. Inspect the corresponding catch too, especially if the latch was forced or the cowling came loose unexpectedly.
Confirm whether the supplier is offering one component or a complete assembly. Keep the diagram callout number and required quantity with your order. Use the service instructions for any adjustment or hardware replacement.
Seals
Check the perimeter seal for cuts, missing sections, and areas that have come out of position. Identify it by its location in the parts diagram – a catalog may show several seals, grommets, and dampers around the cowling assembly.
A separately listed seal does not make every seal replacement an owner-level job. The F150D/FL150D/F150F owner’s manual directs owners to a Yamaha dealer when this rubber seal is damaged. Follow the instructions for your engine rather than choosing adhesive or changing latch tension to compensate for a damaged or unseated seal.
Vents, insulation, and graphics
Inspect inside the cowling before deciding that a replacement shell is all you need. Compare the air-duct pieces, liner or insulation, dampers, and attachment hardware against the applicable parts diagram. Some items may be separate; others may come with an assembly.
Before ordering, confirm which parts come with the new cowling and which you will need to transfer from the old one. Leave the air openings clear, and use the correct replacement liner if the original is damaged or missing.


Fitment Checks Before Ordering a Complete Cowling
Use this checklist when comparing listings or asking a supplier to confirm fit. It is particularly useful for used cowlings, where the exterior photo may tell you little about the mounting points or included hardware.
Check |
Confirm before ordering |
Full engine model |
Record the complete model designation including all letters and suffixes, not just horsepower. |
Serial and production range |
Match the engine identification number to the applicable catalog range. |
Current OEM part number |
Confirm the listed number and any supersession for this specific application. |
Assembly vs. bare shell |
Distinguish top cowling, bottom cowling, bare shell, and component parts. |
Finish and graphics |
Verify color and whether decals, emblems, and labels are supplied or sold separately. |
Included service parts |
Get a clear list: seals, hooks, dampers, duct pieces, and hardware included with the part. |
Condition (used part) |
Request inside, rim, and mounting-point photos plus any repair history. |
Order terms |
Confirm availability, shipping arrangements, and the return policy before purchase. |
The word “assembly” is not a guarantee that every pictured part is included. Read the diagram’s assembly notation and the seller’s description together. Compare the cost of getting each option ready to install – a less expensive bare shell can still need graphics, service parts, or labor that a more complete cowling already includes.
Removing and Installing the Cowling Without Damaging Latches or Seals
Use the removal and installation procedure for your exact model. Yamaha warns against removing or replacing the cowling with the engine running, and cautions to allow hot engine parts to cool before reaching inside.
- Release every lock specified in the manual before lifting. If the cowling resists, stop and check for an unreleased attachment rather than prying at the edge.
- Support the cowling as you lift it clear. Arrange help if it is awkward to handle, and have a clean, padded surface ready to set it down.
- Inspect the mating edge, seal, and locating points before refitting. Remove loose debris and keep hoses or wiring clear of the joint.
- Align the cowling as the manual specifies, then engage the locks in the order and manner shown. If it sits unevenly or a latch needs unusual force, lift it off and find the obstruction or mismatch before proceeding.
As an example, the F150D/FL150D/F150F manual calls for aligning three locating protrusions with their holders before closing the lock levers. Other models have their own procedures – latch number, location, and release direction should not be assumed from one model’s instructions.
Final checks before returning to service
Seal contact: confirm the seal is seated around the full perimeter and has not folded or slipped out of position.
Latch engagement: confirm every lock is secured and perform the cowling-fit check described in your manual.
Ventilation: inspect all intended openings and duct areas for packing material, rags, loose liner pieces, or other obstructions.
Remaining damage: confirm that a new upper cowling has not hidden an unresolved problem with the lower housing or its hardware.
Yamaha’s F150 manual checks the installed cowling by pushing it with both hands. It warns that incorrect installation can admit water or allow the cowling to come off at speed. If fit remains doubtful, have it checked before use.
Common Ordering Mistakes to Avoid
- Ordering by horsepower alone. Yamaha has produced many different 150 hp engines (and other displacements) across decades of production. Without the complete model code and serial range, horsepower is not a useful identifier for cowling selection.
- Confusing top and bottom cowling. These are separate parts with different part numbers, latches, and seals. Confirm which is damaged and which you are ordering.
- Assuming included parts without confirming. A listing described as an “assembly” may still be a bare shell. Confirm which seals, latches, graphics, and liner pieces are included before placing the order.
- Ignoring bottom-cowling damage. If a latch or mounting point on the bottom cowling is damaged, replacing only the top cowling will not restore a proper fit.
- Ordering before the water source is confirmed. Water inside the cowling requires diagnosis. Ordering a complete replacement before the entry point is identified risks replacing a part that was not the cause.
Choose the Replacement That Fits Your Engine
A damaged latch or seal is worth checking before committing to a complete cowling replacement. If the shell does need replacement, take your complete engine identification and a clear list of required components to the supplier.
PartsVu offers Yamaha cowling assemblies, seals, latches, and related hardware, plus cowling decals and emblems. Confirm fit using the full model designation and what is included in the part description, then check the installed cowling’s seating and locks before returning to service.
Frequently Asked Questions
How do I find the correct replacement cowling for a Yamaha outboard?
Use the complete engine identification label – not the horsepower decal – to find the correct Yamaha parts diagram. Record the full model designation including all suffix letters, the serial number, and the production date. Confirm the cowling’s current OEM part number and any supersession in the catalog. Check color, graphics, and supplied components separately. Horsepower and appearance alone are not enough to verify fit.
Can I replace only the Yamaha cowling latch or seal?
Often, yes – those parts are listed separately in the parts diagram. Check the diagram for both the top and bottom cowling assemblies before ordering, since some hardware is listed with the mating assembly. Inspect the mounting points and corresponding catch before ordering a latch. For a damaged seal, follow the service guidance for your engine. Some owner’s manuals direct seal replacement to a Yamaha dealer rather than describing it as an owner-level task.
Is a Yamaha cowling cover the same as the engine cowling?
No. The engine cowling is the rigid housing that encloses and protects the engine. A fabric cowling cover goes over that housing for storage or transport protection under the conditions specified for the accessory. Buying a fabric cover will not replace the engine’s missing or damaged shell, latches, or seal.
Can a damaged cowling seal let water into the engine compartment?
Yes, a damaged or poorly seated perimeter seal can compromise the joint between the top and bottom cowlings and allow water entry. However, water inside the cowling does not, by itself, identify the seal as the cause. Have the water source investigated before deciding which part to replace.
What do Yamaha model suffixes mean for cowling selection?
Yamaha model suffixes (such as D, F, L, X, B in model codes like F150D, FL150D, or F150XB) identify engine variants, production years, and regional specifications. Two engines both rated at 150 hp may have different suffix codes and require different cowlings, latches, or seals. Always use the full model designation when searching the parts catalog – never use horsepower or a partial model code alone.
What should I check when buying a used Yamaha cowling?
Confirm the full model application and current OEM part number, not just the seller’s description. Request photos of the interior, the sealing rim, and all mounting points – exterior photos rarely reveal mounting-point damage or previous repairs. Ask about repair history and confirm which seals, latches, graphics, and liner pieces are included. Consider the cost of any additional service parts or labor required to make it ready to install.
What affects the price of a replacement Yamaha outboard cowling?
The specific application, new versus used condition, finish and graphics, and included components all affect the total. A bare shell without seals, latches, or decals is typically less expensive but may require additional parts and labor. Compare the complete cost of getting each option ready to install rather than comparing the listed price alone.