
Yamaha 4-Stroke Oil Change - 100-Hour Service
Performing needed maintenance in a timely manner on your Yamaha outboard is the key to its overall longevity and reliability. This article provides a step-by-step guide for Yamaha 4-stroke oil change, the first step in 100-hour service.
Yamaha 4-Stroke Oil Change - 100-Hour Service
On a Yamaha four-stroke, engine oil weight and capacity can be found by reviewing the tag on the top plastic shroud on the engine under the cowling cover. Or, you can look in your owner’s manual.
Shop Recommended Products
Prior to removing the old oil, check the dipstick level by lowering the engine to the running position and removing the cowling. Note if the cowling latches feel stiff or sticky. Latches are often overlooked during maintenance and are prone to salt accumulation for boaters who primarily boat in saltwater. If you discover salt accumulation of the latches, this residue should be removed – a salt remover may be required.
Yamaha color codes oil as yellow, so locate the dipstick and fill plug by looking for their bright yellow color. If the engine oil is high on the dipstick, it is possible that the oil was overfilled during the last service, or that the engine is “making” oil due to fuel contamination of the oil from improper ring seating or another serviceable condition. You should also note the smell and color of the oil. Dirty oil will appear dark brown to black in color. Milky brown oil indicates water contamination, whereas a notable gasoline smell indicates that your engine may not be reaching proper operating temperature, or that your rings could be allowing excessive blow-by due to carbon fouling or improper break-in.
Removing the Old Oil
Spent engine oil can be removed from the engine by extraction or via the oil pan drain screw plug. The extraction method requires the use of a vacuum extractor which is inserted down the dipstick tube and uses suction to pull the spend oil from the pan. This method tends to be very clean and is probably the most widely used among marine technicians. Alternatively, the drain screw itself can be removed. On inline Yamaha four stroke models (F15 to F150), the Seawell drain kit can be used to minimize the mess. On larger V6 models, to access the drain screw, remove the plastic chaps that cover the midsection of the engine. Be sure to have plenty of drain pan capacity as some of these engines can hold up to seven quarts of oil. We also recommend a petroleum sorbent pad to catch and errant drips and keep your driveway or lawn clean.
In cold climates, it may be necessary to start and warm the engine prior to draining the oil to thin it slightly. It is preferable to perform the engine oil change as the first part of the service if at all possible though as the maximum amount of oil will be in the oil pan already from the engine sitting since its last use. This allows you to extract as much old, dirty oil as possible and minimize contamination of your fresh oil.
Removing the Old Oil Filter
As the spent oil is draining, you can work on removing the engine oil filter. Depending on your specific Yamaha model, your filter may have a drain lip that will help keep the mess to a minimum when you unscrew the old filter, but most older engines don’t have this feature. We suggest being prepared with plenty of absorbent rags or place a small cup that is cut to be placed below the filter prior to removal. Using a properly sized filter wrench or socket is the best way to loosen the filter and Yamaha even produces a socket for their 5GH sized filters. Some technicians make a practice of puncturing the filter to allow trapped oil to drain back into the block prior to removal, but this will ruin your ability to take the filter apart later for further inspection should you wish.
Performance Testing of Used Oils Provide Important Insights
On the topic of learning more about your engine oil, several laborites provide performance testing of used oils to give you some additional insight on your engine. Blackstone Labs is one such provider, and they have a great mail-in kit that includes everything you need to submit an oil sample. They can also test gear oils, hydraulic fluids, and oils from your other vehicles or toys. Results could tip you off to an accelerated wear condition inside of your engine long before any other symptoms show up. If you still want to know more about the internals of your engine, you can also purchase an oil filter cutter and open the spent filter for further inspection. You will be looking for any evidence of contamination, metal dust, or metal shavings. As one example, when a Yamaha inline four cylinder, like the F150, has a damaged fiber gear from the balancer, black contaminant in the oil filter from that fiber gear will typically result.
Install New Oil Filter and Add Fresh Oil
Once you have inspected to your spent oil and filter, set them aside for proper disposal. If you removed the drain screw to empty your oil, install a new crush gasket and reinstall the drain plug. The new oil filter should be removed from its package and the o-ring lubricated with a thin coat of fresh engine oil. Spin on the fresh oil filter and gently tighten with your filter wrench to seat the o-ring without over-torquing.
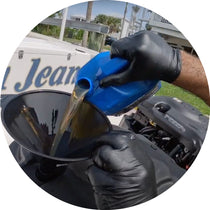
Loosen the yellow oil fill plug on the top of the engine and pour in fresh oil. It is recommended to add just less than stated capacity and check oil level on the dipstick after allowing a few minutes for the oil to properly drain down into the oil pan with the engine trimmed down. Filling the oil to the lower level on the dipstick will help you to measure if the oil level changes over time after the engine has been in operation. With your Yamaha 4-stroke oil change complete, you are now ready to move on to completing the rest of your 100-hour service.
How to Perform Yamaha 100-Hour Service eBooks
Download Free eBooks
eBook available for both 4-stroke and 2-stroke outboards.

