
How to Change a Mercury Verado Timing Belt
Maintaining the optimal performance of your Mercury Verado outboard engine requires regular maintenance, including periodic replacement of the timing belt. The timing belt plays a crucial role in synchronizing the engine’s internal components, and ensuring its proper functioning is essential to prevent potential damage.
In the video embedded within this article, the timing belt change was performed on a Mercury Verado 300. However, the video and the step-by-step instructions included within this article apply to:
- Verado L4 Models (135 – 200 HP)
- Verado L6 Models (200 – 400 HP)
By following the instructions in this guide, you’ll be equipped with the necessary knowledge to replace the timing belt on your Mercury Verado successfully. Whether you’re a seasoned boat owner or a first-time DIYer, this guide will assist you, saving you time and money on professional service. Read on to maintain your Mercury outboard’s engine performance, ensure reliability, and extend its lifespan.
What You'll Need for the Job
- Replacement timing belt
- Socket set
- Rags or shop towels
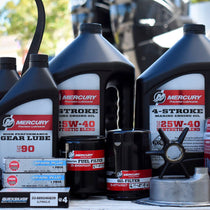
Additionally, the belt needed for the Mercury Verado engines mentioned above is included in Mercury Verado 300-hour service kits.
Why Is Timing Belt Replacement Important for Mercury Outboard Engines?
The timing belt is the heart of your engine, ensuring smooth operation and synchronization. Timing belt maintenance is essential for responsible ownership and reliable operation for various reasons.
- Overall Engine Health: The timing belt serves as the vital organ of your engine, ensuring harmonious and synchronized operation. If the timing belt deteriorates, it can lead to many issues for your engine.
- Prevention of Damage: Proactively replacing the timing belt safeguards against substantial damage. Sudden breakage of the timing belt while operating your outboard motor can result in severe consequences and potentially irreparable harm to the engine.
- Financial Savings: Although it may appear an unnecessary expenditure, regular timing belt replacement can yield monetary benefits. Rectifying the damage caused by a broken timing belt is typically far costlier than the routine replacement performed during maintenance.
- Optimal Performance: A new timing belt facilitates the peak performance of your outboard motor. If the timing belt is worn out, it may impair proper functionality, diminishing the motor’s overall performance.
- Prolonged Lifespan: Consistent maintenance practices, including timing belt replacement, can extend the longevity of your Mercury Outboard Engine.
How Often Should the Timing Belt on a Mercury Outboard Be Replaced?
To keep your outboard motor in excellent condition, it is essential to adhere to the manufacturer’s recommendations regarding timing belt replacement. While specific intervals may vary depending on the model and usage, changing the timing belt is generally part of a Mercury Verado’s 300-hour service. However, this general guideline does vary. Here are some general factors and recommendations to consider:
- Consult the Manufacturer’s Manual: Your Mercury Verado owner’s manual is the first and most reliable source of information regarding timing belt replacement. It provides specific instructions and guidelines tailored to your Mercury outboard engine model. Refer to the manual for the recommended timing belt replacement schedule.
- Consider Usage and Operating Conditions: How often and under what conditions you use your outboard motor will affect the frequency of timing belt replacement. Engines that undergo frequent and demanding usage, such as in commercial or high-performance applications, may require more frequent timing belt replacements compared to engines used for recreational purposes.
- Inspect the Timing Belt Regularly: In addition to following the manufacturer’s guidelines, inspecting the timing belt regularly visually is essential. Look for wear, cracking, fraying, or any other visible damage. If you notice any abnormalities or if the timing belt appears worn, it may be necessary to replace it even before the recommended interval.
- Consider Age and Time Since Last Replacement: Timing belts are subject to degradation over time, even if they haven’t reached the recommended time or hour limit. Factors such as exposure to extreme temperatures, humidity, and harsh operating conditions can accelerate the aging process. If the timing belt is approaching the recommended replacement interval based on age or has been a significant amount of time since the last replacement, it is prudent to consider replacing it.
- Pay Attention to Decreased Engine Performance: A worn timing belt can lead to decreased engine performance, including reduced power output, slower acceleration, or diminished overall efficiency. If you notice a significant decline in your engine’s performance, it is advisable to inspect the belt and replace it if necessary.
Step-by-Step Guide to Changing the Timing Belt on a Mercury Outboard
You’ll need the following:
- Replacement timing belt
- Socket set
- Rags or shop towels
To change your Mercury Verado timing belt, follow the steps below:
- Preparation: Gather all the necessary tools for this task.
- Remove the Engine Cover: Remove the engine cover, typically connected by grommets. If necessary, use the appropriate tools to disconnect the engine cover. Pull the cover straight up and off the engine block to expose the engine components.
- Release the Tensioner: Pull back on the tensioner using the ratchet to release tension.
- Remove the Old Timing Belt: With the tensioner pulled back, you can slide off the old timing belt. Discard it appropriately.
- Release Tensioner Pressure: Slowly allow the tensioner to move back into place.
- Loop on the New Belt: Begin with the starter and loop the new belt around each component. Be careful to follow the exact path of the old belt.
- Position the belt Behind the Tensioner: While holding back the tensioner, twist the belt slightly to slide it behind it. Make sure it fits snugly and is properly aligned.
- Release the Tensioner: Slowly release the tensioner once the new belt is in place. It should press against the belt, providing the necessary tension to function correctly.
- Double-Check Your Work: Inspect the belt to ensure it’s properly seated and aligned.
- Replace the Cover: Place the engine cover back onto the engine block. Ensure it fits snugly and is securely in place.
- Test the Engine: Before embarking on your next trip, start the engine (make sure you have water flow to cool the engine) and check to ensure everything is running smoothly.

Concluding Thoughts on Timing Belt Replacement
Changing the timing belt on a Mercury outboard is fundamental to properly maintaining your boat’s engine. Applying the outlined steps above can significantly reduce the risk of engine problems and improve overall performance. Armed with this essential knowledge, you’re ready to handle one of the most critical aspects of outboard maintenance.
Remember, the timing belt plays an instrumental role in the life and efficiency of your Mercury outboard. With this guide, you’re ready to ensure the peak performance of your Mercury outboard, one timing belt change at a time.
**Important Note**
Always consult your engine’s owner’s manual for instructions and information specific to your engine. If you need clarification on changing a timing belt, consult a Mercury Marine-certified mechanic.
PartsVu and Platinum Mobile Marine Partnership
Huge thanks go to Frank Cutri, the owner and operator of Platinum Mobile Marine, a mobile mechanic service serving the Lee County, Florida area, for partnering with PartsVu on the Boat Maintenance Matters series. Together, we are working hard to build a library of step-by-step instructions on common outboard motor repair and maintenance tasks.


