At the start of a boating season, we highly recommend going through the proper Yamaha outboard season breakout steps. We've all experienced that there are two different kinds of people at the launch ramp: those who are prepared, and those who are not. You don’t want to be the person to get your family and friends excited for a long-awaited trip on the water, only to disappoint because your engine won’t startup. Doing some simple maintenance on your Yamaha outboard before breaking out your boat will save you from a lot of embarrassment and wasted time.
Yamaha Outboard Season Breakout Checklist
1 - Add Yamaha Ring Free to your fuel tank and top off the gas. There are differing thoughts on filling the fuel tank before storage. Whatever your approach, good fuel treatment at the start of the season is important. PartsVu recommends Ring Free and Yamaha Fuel Stabilizer and Conditioner with every fuel up, especially if ethanol fuel is being used.

2 - Check the fuel system connections for leaks and the fuel hoses for softness or brittleness. Replace if needed.
3 - Check the grounding cables on the engine mounting bracket for breakage or corrosion. Clean them if necessary.
4 - Charge your batteries, and reconnect the battery cables if you disconnected them before storage. A trickle charge is always the best way to preserve the life of your battery during storage. Yamaha Battery Terminal Cleaner and Protector is extremely helpful to remove corrosive build-up on battery terminal posts to help increase power output and extend battery life.
5 - Check your propeller. Remove the propeller, use Yamaha Marine Grease and check that the lower unit seal is not compromised.
6 - Inspect for any leaks out of the lower unit. Yamaha Gear Lube Kits help you to properly maintain your lower unit.
7 - Steering – move the steering wheel, checking for free movement through the full range.
- Mechanical Cables – grease the ends of the cable where it connects to the helm and to the engine.
- Hydraulic – check for any hydraulic oil leaks, examine the hose, especially hoses by the engine and cylinders. Add marine hydraulic steering fluid as needed.
- Power-Assisted Systems – check for any leaks, examine hoses, check/fill reservoir.
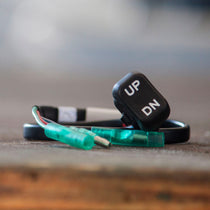
8 - If your outboard is equipped with a power trim and tilt system, check that its operation is functioning as it should. Look for any fluid seepage around the piston seals and reseal/replace as needed.
9 - Test run the motor before launching the boat, burning off any fogging oils or other storage elements introduced into the engine. This provides an opportunity for you to check all of the gauges, electronics/navigation systems, examine for leaks, and verify overall operating functionality before your first trip. (When running your engine out of water, the team at PartsVu recommends using engine flushing earmuffs for the lower unit).
Yamaha Outboard Season Breakout - Four-Stroke
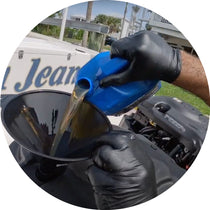
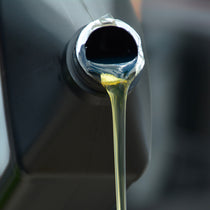
1 - Check the engine oil level by tilting the engine vertical and allowing 5 minutes for the oil to fully settle. Pull the dipstick and confirm oil level. Black, burnt, or milky oil should be replaced and may indicate bigger issues.

2 - Check the primer bulb for proper functionality and the condition of the bulb and fuel lines.
3 - Inspect under the cowling for any animals who may have made your engine home during the offseason. Yes, this happens more often than you would think!
4 - Look for obvious signs of salt accumulation under the cowling as this would indicate a leak. If no salt is found, apply a coating of anti-corrosion spray
**Save up to 30% off MSRP on Yamaha Oil Change Kits
Yamaha Outboard Season Breakout - HPDI / EFI
1 - Run the engine, burning off anyfogging fluids and testing for proper operation of the engine.
2 - Check the two-stroke oil reservoir. Verify there’s plenty of oil on hand for operation. **Save up to 22% off MSRP on Yamalube 2-Stroke Oil
3 - If you mix the oil in the gas, be sure to have enough oil on hand for refueling. Add Yamaha Ring Free at fill up. Yamaha Fuel Stabilizer and Conditioner is recommended in addition, especially where ethanol gas is being used.
4 - Check the primer bulb for proper functionality and the condition of the bulb and fuel lines.


