
How to Perform a Mercury Verado Outboard Oil Change
Mercury outboard oil change is a critical internal maintenance task that should be performed minimally annually or after every 100 hours of outboard motor operation.
In the video embedded within this article, the outboard oil change was performed on a Mercury Verado 300. However, the video and the step-by-step instructions included within this article apply to:
- Mercury Verado L6 Models, 200 – 400 HP
Additionally, the principles and steps featured in this article and embedded video can be applied to most outboard engines, although the locations of the oil filter, dipstick, oil repository, etc., can vary across Mercury outboard engine models and outboard brands.
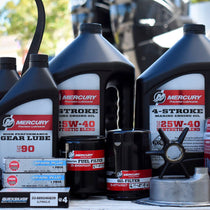
What You’ll Need for the Job
You’ll Also Need:
- Socket wrench
- Drain pan
- Funnel
- Clean rags or paper towels
- Disposable gloves
Why Are Regular Outboard Oil Changes Critical?
Regular outboard oil changes are critical to maintaining the health of your Mercury outboard and ensuring that it runs smoothly. The oil acts as a lubricant, reducing friction between moving parts in the engine. However, over time, oil can become contaminated with dirt, debris, and other particles, which can cause it to break down and lose effectiveness. Additionally, the heat generated by engine operation breaks down oil over time, leading to engine damage and decreased performance.
By performing regular oil changes, you can help prevent this from happening. Fresh oil helps to keep your engine clean and lubricated, reducing the risk of wear and tear on critical components. Additionally, regular oil changes can help to identify potential problems early on, allowing you to address them before they become more serious and costly.
Understanding the Role of Engine Oil in Your Mercury Outboard
The Mercury outboards are complex machinery with many moving parts that must work together harmoniously for optimal performance. Oil plays a critical role in this process, lubricating essential components such as the pistons, crankshaft, and bearings.
In addition to lubrication, the oil helps cool the engine, reducing the risk of overheating. It also acts as a cleaning agent, helping to remove dirt and debris from the engine, keeping it running smoothly.
Using the correct oil for your specific Mercury outboard is essential, as using the incorrect oil can cause damage to the engine and void your warranty. Check your owner’s manual for the recommended oil type and viscosity.
The Benefits of Engine Oil Analysis for Outboard Motors
Regular engine oil analysis can provide valuable information about the condition and performance of your outboard motor. Not only can the oil’s color, texture, and odor indicate potential issues, but specialized analysis services offered by companies like Blackstone Laboratories can provide more in-depth insights into an engine’s wear level.
By catching problems early, boaters can avoid costly repairs and extend the life of their outboard motor. Investing in engine oil analysis offered by Blackstone Laboratories is a smart move to ensure your outboard motor stays in top performance and protects your investment.

How to Conduct a Mercury Verado Outboard Oil Change
You’ll need the following:
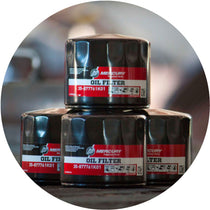
- Mercury oil change kit (includes oil and oil filter for your specific Mercury outboard)
- Mercury drain plug gasket*
- Oil filter wrench (Mercury offers oil filter wrenches designed for specific filters, or you can opt for a universal oil filter wrench)
- Oil extraction pump
- Socket wrench
- Drain pan
- Funnel
- Clean rags or paper towels
- Disposable gloves
*The Mercury drain plug gasket linked about is applicable for all Verado engine models. If you own a Mercury other than a Mercury Verado, please check Mercury schematics for the correct part number.
Steps for Mercury Verado Outboard Oil Change
Preparation
Before beginning the oil change process, holding off starting the engine is wise. A cold engine helps drain engine oil more thoroughly and effectively throughout the system.
Make sure the boat is secure and on a level surface. If you want to keep your hands clean, wear gloves and place an oil catch pan underneath the engine.
Remove the Old Oil & Filter
- Locate the Oil Drain Plug: Refer to your owner’s manual to find the location of the oil drain plug. This should be located at the bottom of the engine.
- Drain the Oil: Carefully remove the oil drain plug with a hand wrench. It’s essential to be cautious while removing the oil drain plug to prevent any damage to the plug’s threading or surrounding parts. Let the oil flow into the oil catch pan. You must ensure the oil drains into the pan and not spills into the water or ground. Wipe engine components clean of any excess oil that may have dripped during the process. Keep the engine free of residual oil and clean areas where oil may have dripped or spilled.
- Remove the Oil Filter: While the oil drains, locate and remove the old oil filter using an oil filter wrench. Place the old filter in the oil catch pan.
Replace the Oil, Filter, and Drain Gasket
- Install New Oil Filter: Before installing the new filter, apply a small amount of oil to the gasket on the top of the new filter. This helps create a good seal. Screw the new filter into place as per the instructions on the filter. Using high-quality oil and filters for your Mercury outboard engine is crucial – we recommend using genuine Mercury outboard parts or Mercury Quicksilver products.
- Inspect Drain Gasket: Check out your drain plug gasket. You’ll need to replace it if it is compromised, cracked, or brittle. We recommend replacing the gasket as part of every oil change as it is inexpensive and avoids many potential problems.
- Replace Oil Drain Plug: Once all the old oil has been drained, replace the drain plug. Be sure to use a drain plug gasket on the drain plug to prevent leaks. Use a combination of a wrench and your fingers to tighten the bolt. But be cautious not to over-tighten it.
- Add New Oil: Locate the oil fill cap on the top of the engine. Fill the engine with the new oil using a funnel, careful not to overfill it. The quantity required and type of oil recommended can be found in your engine’s user manual.
- Check Oil Level: Start the boat’s engine while in the water or connect a water source to the engine before starting it to keep it cool, and let it run for a few minutes. Turn off the engine and then check the oil level using the dipstick. You may need to add more oil to bring it up to the correct level.
Clean Up
Dispose of the old oil and filter responsibly at a recycling center or a nearby auto parts store, and they often accept old oil and filters for recycling.
Following these steps and guidelines ensures that your Mercury Verado outboard is running at its best. Regular oil changes are an essential part of outboard maintenance, and by performing them regularly, you can help to extend the life of your engine and keep it running smoothly for years to come.
**Important Note**
Always consult your engine’s owner’s manual for instructions and information specific to your engine. If you need clarification on changing your Mercury Verado’s oil, consult a Mercury Marine-certified mechanic.
PartsVu and Platinum Mobile Marine Partnership
Huge thanks go to Frank Cutri, the owner and operator of Platinum Mobile Marine, a mobile mechanic service serving the Lee County, Florida area, for partnering with PartsVu on the Boat Maintenance Matters series. We are working hard to build a library of step-by-step instructions on common outboard motor repair and maintenance tasks.


