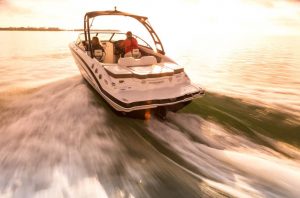
MerCruiser Sterndrive Season Breakout Guide
This MerCruiser Sterndrive season breakout guide is designed to help make sure your season gets off to a great and safe start. By following this season breakout guide, you can make sure your first trip out on the boat is a safe and enjoyable one! Before you get started, make sure you have all the right MerCruiser parts for your boat.
Start MerCruiser Season Breakout Uncover & Unwrap
The first step for MerCruiser Sterndrive season breakout is to peel off the covers and see how it faired through the winter. But, before you wad up the cover and put it in a trash bag, that expensive hunk of canvas is worthy of a little attention. The fabric itself should be cleaned using a soft brush and a canvas-friendly cleaner like Star brite Sail & Canvas cleaner. Inspect broken snaps and replace them as needed using a snap tool – a worthy investment for a boat owner. The remaining snaps should be lubricated with a Snap Stick – which also works really well on zippers. Finally, consider washing the canvas while it is still installed on the boat and letting it dry thoroughly before storing it. This will help preserve its shape as it dries and make it easier to install next time. If you happened to shrinkwrap your boat, remove heavy tape residue off the hull with a product like BoatLIFE Life-Calk Solvent and Cleaner – it does a great job and will not hurt the gelcoat finish. This product also does an excellent job brightening white vinyl rub rail inserts or trailer PVC guideposts.
Walk-Around Inspection
With the cover off the boat, the next MerCruiser Sterndrive season breakout step is a careful walk-around inspection.
Check/look for:
- Fluid (engine oil, gear lube oil, trim fluid, gasoline) leaks under where the boat is sitting
- Check the drain plug area for the presence of algae which can indicate that your hull has been slowly dripping water for some time.
- Thru-hulls at and below the waterline are also very worthy of consideration- intake grates can be crushed from beaching, trailers, forklifts, or lifting slings. Crushed intake grates will reduce water flow to the equipment they supply. Plastic thru-hull fittings can crack from age and UV exposure and are especially dangerous for boats that float in the water all the time.
MerCruiser Sterndrive Season Breakout - Protect Your Boat from UV Rays
Mercruiser season breakout is a great time to take the needed steps to protect your boat from damaging UV rays. If you noticed your hull is chalky, applying a polishing compound prior to waxing will really bring out a bright shine.
- Polishing compounds are best applied using a high-speed buffer and working small sections at a time.
- Always apply wax after buffing.
- Wash the boat again after you’ve completed waxing. to help knock down the static charge all that rubbing creates and will keep dust from sticking to your shiny ride.
Your fiberglass is not the only thing that faces a tough battle against UV and dirt. Upholstery is easily damaged by exposure to the sun or harsh chemicals. Marine upholstery is often sewn with cotton thread, which is very sensitive to bleach.
Your vinyl should feel soft and supple. Resist the urge to go straight to powerful household products when you pull the cover off the boat and find mold or mildew on your vinyl, rather go for a marine vinyl cleaner. Used correctly, mildew stain-removing products will lift dirt and light staining without damaging the delicate vinyl. Using a soft brush, microfiber rag, and melamine foam sponge will yield the best results – especially on textured vinyl.
To keep your vinyl conditioned, protected, and looking its best, consider 303 Products Aerospace Protectant or Star brite Mildew Stain Blocker.
Season Breakout Battery & Electrical System Assessment
With the exterior looking good, the next step to get your boat ready for spring is battery management. Many boaters remove or disconnect their batteries for storage during the off-season.
Prior to reinstalling your battery(ies):
- Visually inspect your boat battery for evidence of physical deformation (swelling or sucking in), leakage, corrosion, and age.
- Consider any fluid leak or crystal accumulation on your boat batteries to be hazardous. CRC Battery Cleaner indicates the presence of acid and will neutralize the acidic properties.
Generally, marine batteries last about three years with proper care and maintenance, so consider a replacement if your battery is at or older than three years.
Wet Cell Batteries
This is the best possible time to check and adjust fluid levels inside the battery to compensate for evaporation. Follow the manufacturer’s instructions and use protective gear as you are working with acid. Close the battery back up and charge it in the shop. You might also re-install and charge if your vessel is equipped with a marine-grade onboard charger.
Cleaning Your Boat Battery
A terminal brush is an inexpensive and very handy tool to help with battery installation. You can easily clean the terminals and wire ends before reinstalling the leads. Once installed, the dissimilar metals used to create the ring terminals, battery cable ends, and terminal studs will promote corrosion, so a corrosion inhibitor is really important in this area.
Don’t forget to properly tighten your battery hold-downs, as vibration is one of the leading causes of premature battery failure.
Electrical Systems Check
MerCruiser season breakout is a great time to do a systems check on your boat. Begin by toggling switches on and off and verifying the associated function turns on as it should. This is a quick and easy way to check pumps and lights before getting back on the water.
Older festoon bulbs used for navigation and anchor lights are quite susceptible to corrosion and often fail from sitting. Clean the contacts with a wire brush and consider replacing older bulbs with LED bulbs for brighter lighting that uses less amperage.
Bilge Pumps, Float Switches & Fresh Water Systems

Float switches and bilge pumps are critical safety gear that should be inspected. Properly wired float switches should function with or without the battery switch being turned on, so be sure to check both ways. Most boats are also wired so that the operator can manually toggle the bilge pump on. Verify that the pump runs properly and that your bilge wiring, discharge hose, hose clamps, and thru-hull fitting are all in great shape. Keep in mind that your boat may have multiple pumps/floats.
If your boat’s freshwater system was winterized, be sure to fill your tanks and flush antifreeze from the system and dispose of it per the manufacturer’s recommendations. Consider a product like Spring Fresh to flush the freshwater system and clean the lines of any remaining antifreeze.
Any Pests Take Up Residence?
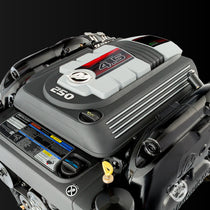
Resist the urge to turn the key and start that engine just yet. Mother nature has had months to wreak havoc on your boat, so spend a few minutes making sure you don’t have any surprises waiting. Remove your cowling and begin with a visual inspection of your engine. From birds nesting inside the cowling’s air intake to mud dauber wasps constructing condos to ants invading wiring harnesses, critters have no place inside your engine. Shine a flashlight inside your prop to the exhaust path or remove the prop to inspect that area as well if it was not taped shut for storage.
MerCruiser Sterndrive Season Breakout - Check Engine Fluids
Even if you stabilized your fuel and performed a full 100-hour service prior to the layup as Mercury Marine recommends, to get your boat ready for spring, you still need to check to make sure nothing went wrong during the winter months.
- Pull a large fuel sample by removing your fuel supply line and pumping with the primer bulb into a clear glass container.
- Check for water or debris.
- Inspect your fuel supply hoses, clamps, and primer bulb for signs of cracking or wear – replace as needed.
- Reconnect your fuel supply line to the engine and pump the primer bulb until it is firm and all engine fuel cavities have been filled.
- Check the engine oil and note if the level appears to be significantly overfull – a possible indication that water contaminated the oil tank.
- Inspect your gear lube. While you may have serviced and changed your lower unit lube just before your layup if you didn’t thoroughly “burp” excess air from the lower unit while filling, you may have room for more lubricant after months of sitting. It also gives you one more chance to verify that no water has contaminated the lubricant during the off-season.
Flush Your MerCruiser Engine
With your pre-checks all completed, it is time to connect a hose and move to the helm. Be sure that your flush attachments fit your lower unit appropriately, and remove the lower unit intake screens for the best water pickup. Note that some MerCruiser Bravo One sterndrives with dual water or low water pickups require additional flush block-offs to make sure they don’t suck air. In the absence of the block off, duct tape works too.

If you have not previously run your engine on a flush attachment, consult your owner’s manuals for specific instructions. From the helm, lower the engine into a normal running position. Verify the garden hose water is flowing and that the area around the boat and propeller is clear. With the control in neutral and key lanyard hooked up, turn the key to the “run” position. Check your gauges and observe the voltage reading. Ideally, this should be in the 12.6-13.2V range. If lower, charge your starting battery and further investigate. Start the engine and allow it to idle – listening for any abnormal noise or vibration. Verify that the gauges are all working properly and the engine is charging the onboard battery between 13.6-14.3V. Check for adequate water flow coming from the exhaust and tell-tale stream of your engine. If the engine runs properly on the hose, turn it off and re-check the engine oil level after allowing it to sit for a few minutes. Reinstall the cowling, remove the flush (and tape), and get ready to go boating!
MerCruiser Sterndrive Season Breakout - Trailer Checklist
Before you hook up your truck and head to the ramp, give that trailer a good inspection too. The following are easy steps to follow:
- Test the trailer lights – including brake lights and turn signals
- Check the inflation on your tires when the tires are cold.
- Check the tread on the tires– try sticking a penny upside down in the tread. If the top of Lincoln’s head is visible, you need new tires.
- Check the tires for cracks on the sidewalls. The DOT date code listed on the side will give you a clue as to the age of your rubber.
- If you have brakes on your trailer, check them. Drive the trailer around for a few minutes, coming to several stops. If the hubs or rotors are hot after this test drive, the brakes are working. Listen for any abnormal noises while driving the trailer.
- If your trailer has a brake battery, hook it up to a charger to make sure it’s working.
- Check and lubricate the wheel bearings.
- Next, check the lug nuts in a star pattern.
- Check the winch strap and tie-downs for wear. If they’re fraying or torn, it’s time to replace them. Dry rot frequently occurs, creating potentially dangerous situations. When in doubt, replace.
- Clean the winch with some solvent-based cleaner and a cloth. An old toothbrush can be used on the smaller parts.
- Lubricate the winch after it’s dry. Use a brush and cover all parts with a light coat of winch grease. But, be careful to not apply lubrication to the strap or other tie-downs.
- Lubricate the tongue jack.
- Make sure your trailer hitch lock is working properly.
- Check safety chains to make sure they are intact and crisscrossed under the tongue. These are cheap and easy to replace, so discard rusty ones.
- Inspect the trailer wiring harness and spray the contacts with dielectric grease to combat erosion.
- If you have rollers, check them for rust, breakage, or cracking.
- Make sure the bunks are tight and that the carpeting on them is not deteriorating.
- Be sure the hitch latch is securely closed. This should be easy if the ball is the same size as the coupler.
- Before each and every trip, make sure the pin securing the ball mount to the receiver is intact.
- Make sure your trailer registration is current.