Why Your Yamaha Outboard Motor Stopped Working
If your Yamaha outboard motor stopped working, you may not know why or where to begin troubleshooting. Fortunately, Yamaha outboard motor problems are usually caused by one of several common issues, and the solutions may not even require a mechanic. You can check for the most common issues yourself, and in many cases, tools aren't required!
Within this post, we'll discuss:
- How to troubleshoot a Yamaha outboard motor that stopped working
- Reasons your Yamaha outboard still isn't working
- The life expectancy of your Yamaha outboard
How Do You Troubleshoot a Yamaha Outboard Motor?
Before you begin, extinguish cigarettes or other smoking materials whether you smell gasoline or not.
It’s best to first address the simplest potential problems before getting into more complicated matters. The following quick fixes may address the reason your Yamaha outboard motor stopped working.
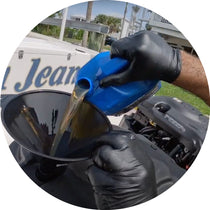
Gas
It may sound obvious, but check anyway! Is there gas in the tank? If so, is the tank vent open? A closed vent prevents air from replacing fuel as the motor pulls it out, which is necessary for firing up the engine.
Kill Switch
If the kill switch isn’t properly attached it could very well be the source of your motor problems. Undo the connection and put it right back into place. The kill switch may need to be replaced altogether-- read more about them here.
Gear
The next point to check is your gear shift. It's easy to knock out of place, which prevents the engine from starting. Make sure that you’re in neutral and try starting your engine once more.

Propeller
Sometimes, the issues may simply be that your engine propeller has something tangled around it. This may be fishing line, excessive seaweed, or some other material that’s worked its way around the blades. Carefully remove anything that may be wrapped around the propeller, and give it a once-over for any damage that may be present. If the propeller is damaged, it needs to be replaced. Debris around the propeller is the most likely culprit if your boat motor starts, but quickly dies.
Choke, Throttle, and Primer Bulb
Try to start the engine both with and without using the choke. If this doesn’t work, try altering the throttle position. Applying more or less gas can sometimes do the trick. Finally, squeeze the primer bulb a few times to make sure the engine is primed up.
Battery
Some batteries have an on/off switch. If this is true for your battery, make sure the switch is on. Then, if your engine is under 25HP, you may be able to use the emergency cord to pull-start. It’s possible to do this with up to a 50HP engine, but be aware that the higher the HP, the more difficult this will be. If this works, the battery is likely the issue. You may need to replace it.
Reasons Your Yamaha Outboard Still Isn’t Working
Ok, so you’ve tried the quick solutions, but you still haven't figured out why your Yamaha outboard motor stopped working. The next step is to do a thorough once-over of each system/engine part until the mystery is solved.
Propeller
If your engine is vibrating excessively, it may be indicative of propeller problems. You should have already checked the propeller for damage and debris, but it’s possible something else has gone wrong. If you’re still unable to start your outboard motor, check the propeller shaft for damage or cracks-- these may not be immediately apparent, but could indicate a need for replacement. Next, use a wrench to tighten the steering pivot and mounting bolt if either is loose.

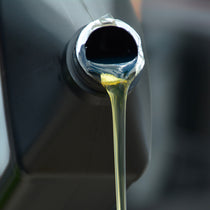
Fuel System
The fuel system is composed of the fuel pump, fuel filter, check valves, fuel hoses, fuel pump diaphragm, and injectors. Listen for the operation sound. If you can’t hear the system attempting to work, check for continuity between the fuse holder, fuse, fuel pump relay, and wiring harness. Repair or replace the defective part(s) if there is no continuity. If there is continuity, replace the electrical fuel pump. If you hear the operation sound, check each part of the fuel system individually.
First, inspect the fuel filters and look for clogs, cracks, kinks, or leaks in the hoses. Replace any parts with damage. Next, check the diaphragm for cracks or other signs of damage. Then, check the vapor separator needle valve for bends or signs of wear. The next step is to check the injectors for clogs and resistance. Then, check for poor connections.
Finally, note if there is any water in the fuel. Ethanol gasoline attracts water, which negatively impacts the combustibility of the fuel. This is especially likely if you haven’t used fuel additives or stabilizers. Water in the fuel may also cause a bad or failing fuel pump. If you find water in your fuel, you may want to check that the pump is in good condition.
You can perform a Yamaha outboard fuel pump test by removing the spark plug wire boot from the spark plug and then removing the spark plug with a plug socket and wrench. Attach a compression gauge into the spark plug socket. If you have an electric motor, you may need a second person to crank your engine over while you twist your throttle position open. Otherwise, you can push the throttle open with one hand and pull the rope start.
What are the Symptoms of a Bad Fuel Pump on an Outboard Motor?
The earliest sign of damage is rapid fuel use. You also may have experienced a bumpy ride or issues with acceleration before getting to this point. If you’ve experienced these problems, you can reference our guide to diagnosing (and preventing!) a bad fuel pump to determine your next steps.
If at any point in this process you discover a part that has cracked, clogged, or shown other signs of wear, it’s most likely preventing your engine from starting. Consult a repair manual for your engine model and year to determine the proper replacement part.

Ignition System
The ignition system is responsible for firing up the engine and keeping it running. Because checking this system may involve sparks and heat, keep flammable liquids away.
The first part of the ignition system to check is the spark plugs. Clean and adjust the spark plugs-- they may need to be replaced. Learn what to look for and how to perform spark plug replacement with our comprehensive guide.
Check the ignition spark with a spark gap tester. If you’ve got a good spark, make sure that the air gap is within specification. Adjust it if needed. If you have a good spark and the gap is within specification, the problem will likely not be found in the ignition system.
However, if you don’t have a good spark, salt buildup on the spark plug caps or ignition coil leads could be causing problems. You’ll also need to check both the spark plug caps and ignition coil leads for proper resistance. Replace degraded parts. When there is no salt buildup and both parts have proper resistance, check the ECM output peak voltage.
If your spark plugs don’t seem to be the issue, check that the electric oil pump and oil level sensor are in good condition. If so, check the reed valve for its condition.
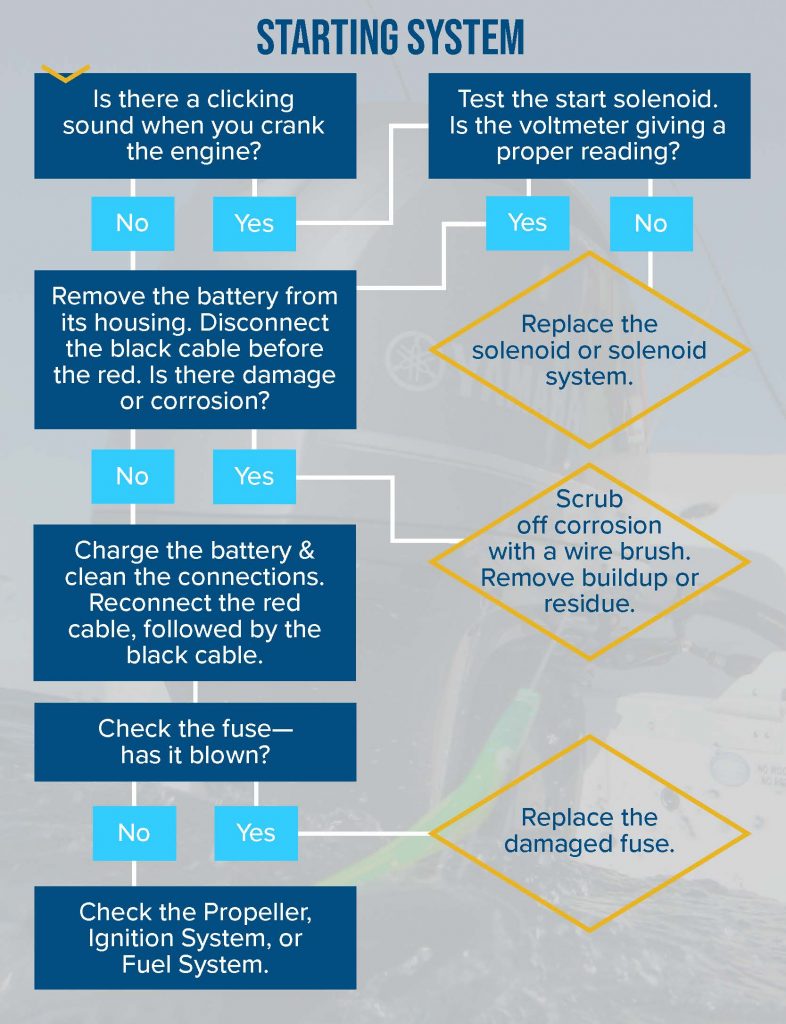
Starting System
If you hear a clicking sound when you attempt to crank the engine, the starter solenoid may be to blame. Depending on the model, you may be able to replace only the solenoid, or you may have to replace the entire self-contained system.
If the start motor isn’t starting at all, you likely have an electrical issue on your hands. Disconnect the black (negative) cable, followed by the red (positive). You’ll then need to remove the battery from its housing. If the battery is damaged, replace it. However, some signs of wear may be fixed.
Corrosion can be scrubbed away with a wire-bristle brush. Any other buildup or residue can be removed with a mixture of water and baking soda at a ratio of 1 cup:1 tablespoon, respectively. If you use this mixture, be sure to thoroughly dry the battery immediately after. Finally, charge the battery and clean the connections. Then, reconnect the positive cable, followed by the negative. Use dielectric grease when reinstalling the connections.
If all is well with the battery, you’ll need to check if a fuse has blown. To check if a fuse has blown, use a screwdriver to remove the electrical cover of the motor. With pliers, carefully remove the fuse holder. If the center is broken, that means it’s blown. You’ll have to check the Yamaha outboard repair manual to determine the correct amperage needed to replace it. If none of this works, continue onto the other systems until the issue is resolved.
What is the Life Expectancy of a Yamaha Outboard?
Yamaha outboard engines have a strong reputation for reliability, and for good reason. Your outboard engine life expectancy, at minimum, is about 1,500 hours (or, 6-8 years for the average boater). However, a properly maintained outboard engine can last more than 4,000 hours! This means that your engine could last for 16-21 years before needing to be replaced.
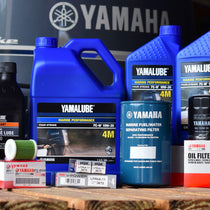
Shop for the boat parts you need with PartsVu and reference our Marine Tool Kits guide to learn about the tools essential to your engine maintenance. If the troubleshooting guide above provided no results, consult a mechanic. They may find the issue, or you may need to replace your outboard altogether.
This guide to troubleshooting why your Yamaha outboard motor stopped working addresses issues common to the majority of Yamaha outboard models. We recommend that you locate or download the repair manual for your specific engine for more information, and consult a certified mechanic over any uncertainties.