Looking to learn how to install trim tab anode on Yamaha outboards?
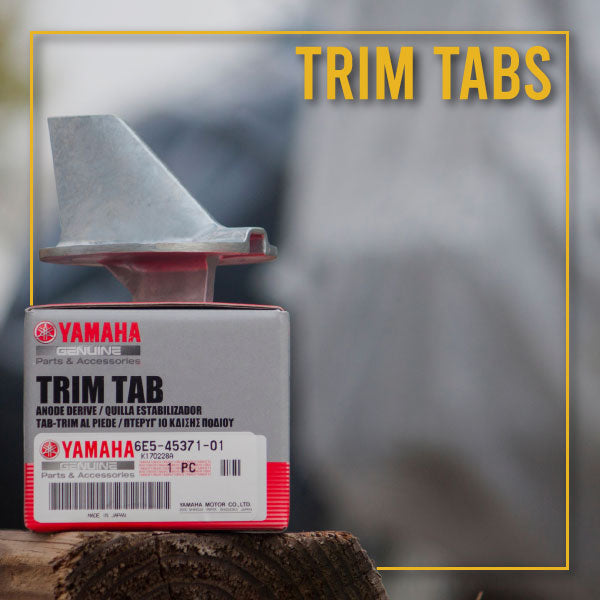
Also referred to as trim tab “zincs,” replacing trim tab anodes is a relatively simple repair that can be performed in a manner of minutes.
However, before we learn how to install trim tab anodes on Yamaha outboards, it’s important to understand what a trim tab anode does on an outboard motor. Learning how trim tab anodes are aligned and installed will make the installation process faster and easier—especially if you need to troubleshoot your Yamaha outboard motor in the future.
What Does a Trim Tab Anode Do on an Outboard Motor?
So, what functions does a Yamaha outboard trim tab zinc anode perform for your boat?
Steering
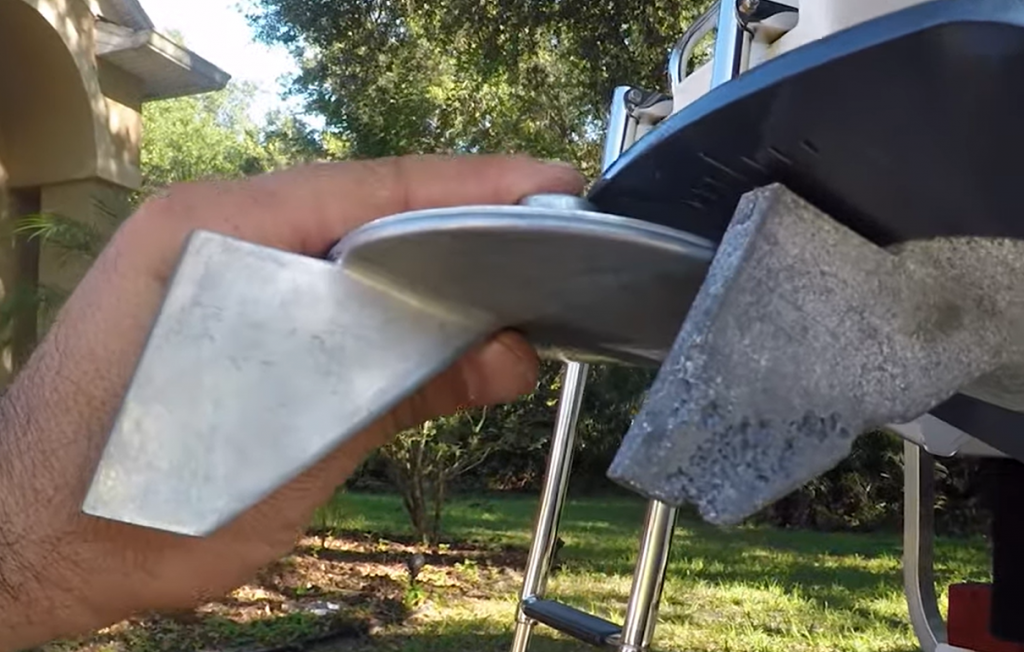
Trim tabs are essential for steering your boat safely and accurately. When properly aligned, trim tab anodes counteract torque pressure generated by the propeller for steering and helps even out “prop-walk,” a propeller's tendency to rotate about a vertical axis. That’s why it’s called a “trim” tab, enabling a more stable ride that offsets unwanted torque. Trim tabs are often set at an offset angle for this purpose - aligned right for right-turning outboard motors and left for left-turning outboard engines. Most Yamaha outboards have a series of hash marks by the trim tab that indicate the offset needed for accurate steering.
Counteracts Corrosion
There are three types of corrosion boaters typically experience:
- Simple electrochemical corrosion
- Galvanic corrosion
- Electrolytic/stray current corrosion
Trim tab anodes absorb these types of corrosion more readily than other engine components, so they serve as a protective barrier to save more expensive and harder-to-repair parts.
Over time, these anodes—typically made of cheap zinc materials—will degrade and need to be replaced. As the material degrades, it begins to lose some of its steering abilities and its ability to attract corrosion. While simply cleaning it with a wire brush will restore it for minor damage, replacement is necessary when corroded to approximately half of its original size. This is why they are referred to as sacrificial anodes—the anode sacrifices itself to protect your engine and its components.
Checking your trim tab anode(s) (and other anodes, for that matter) should be done minimally as part of your annual or 100-hour service.
Other Types of Outboard Anodes
Bear in mind that there are several other types of anodes also located in your Yamaha outboard motor. Depending on your model, your Yamaha outboard may have:
- Lower plate/bracket anodes
- Button anodes
- Internal anodes
While these anodes serve the same anti-corrosion function of the trim tab anode, their function does not affect steering. Replacement is a bit different than trim tab anodes - for example, internal anodes require taking off the engine cover to access them and may only need a light brushing if minor corrosion has occurred.
How to Install a Trim Tab Anode
Now that you understand why trim tab anodes are important for your boat and outboard motor, let’s learn how to install trim tab anode on Yamaha outboards:
- First, identify where the trim tab anode on your Yamaha outboard is. It is typically located above the propeller on the anti-cavitation plate.
- Next, locate and remove the trim tab plug located directly above the trim tab.
- In the cavity, you will insert a socket wrench with an extension to access the bolt securing the trim tab. Most Yamaha trim tabs use a ½” socket wrench.
- Make a note of the hash marks by the trim tab, which indicates how many degrees they will be offset. Use a piece of masking tape if you have to remember the location so you won’t have to adjust it after installation.
- Slowly turn the bolt counterclockwise to loosen the trim tab until it loosens.
- Insert the new trim tab anode. Replacement is the opposite of installation.
That’s the entire process for replacing a trim tab on a Yamaha outboard motor. Simple!
Adjusting the Trim Tab Anode
Now that you know how to install trim tab anode on Yamaha outboards, an outboard trim tab anode adjustment only requires a loosening of the retaining bolt and adjusting according to the hash marks.
Simply adjust the trim tab in the direction it is misaligned - if your boat steers too much to the starboard side, adjust the trim tab right; vice versa for port-side steering. As a word of caution, only make adjustments in one-click increments. Also, make sure the trim tab anode is secure, as a loose trim tab can stray from its original position.
What is the Best Anode for Freshwater?
The best anode for freshwater is made from magnesium. While aluminum and zinc are cheaper alternatives, serving as “catch-all” materials, magnesium helps prevent “potential reversal” at elevated temperatures commonly found in freshwaters. This means that materials besides magnesium may actually draw in unwanted corrosion and electrolysis, especially in marinas where boaters use land power.
Therefore, if you are looking to take your boat out from saltwater to freshwater, it may be wise to perform a Yamaha outboard anode replacement with magnesium anodes.
* * *
Now that you understand the purpose of trim tab anodes and how to replace them, PartsVu.com offers a wide selection of parts to get you back in the water in no time. Shop for your parts today!
This content was designed to serve as a general guide. Persons who are not familiar with marine engine repair and who have not been trained in the recommended servicing or installation procedures should have the work performed by an authorized marine mechanic. Improper installation or servicing of parts can result in engine or boat damage, personal injury to the installer, or harm to persons operating the product.










7 comments
My yamaha outboard does not have a anode on. Should I put one on there?
Thanks for the info on trim tabs it clears some very important questions that I have asks and got no answers