FiltersFilter & Sort
SIERRA
$91.19$102.99Unit price /UnavailableMOELLER
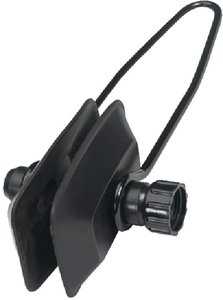
MOELLER - Universal Rectangular Cup MOTOR FLUSHER - 09907700
$9.97$12.59Unit price /UnavailableSIERRA
Sierra - Sierra 3319 Base Water Pump Repair Kit - Mercury 46-96148A8 46-42579A3 - 3319
$66.66$69.79Unit price /UnavailableSIERRA
Sierra - Sierra 43175 Thermostat Kit - Mercury Nissan Tohatsu 9.9 through 30 HP - 43175
$70.02Unit price /UnavailableMOELLER
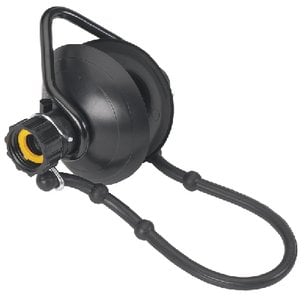
Moeller - Volvo Round Cup Motor Flusher - Fits 200, 250, 270, 280 & 290 HP Lower Units - 09908000
$15.72$20.49Unit price /UnavailableSIERRA
Sierra - Sierra 3517 Water Pump Repair Kit Without Base - Mercury 46-96148Q8 - 3517
$57.76Unit price /UnavailableSIERRA
Sierra - Sierra 3317 Complete Water Pump Kit - Mercruiser - 3317
$73.83$75.09Unit price /UnavailableSHERWOOD PUMP
Sherwood Pump - Impeller Kit w/Gaskets - 09959K
$41.55$45.59Unit price /UnavailableSIERRA
Sierra - Sierra 3407 Upper Water Pump Repair Kit - Mercury 817275A09 - 3407
$97.90$98.09Unit price /UnavailableSHERWOOD PUMP
Sherwood Pump - Impeller Kit w/Gaskets(N10360Gx) - 10077K
$52.78$56.69Unit price /UnavailableSIERRA
Sierra - Sierra 3668 Thermostat Kit - Mercruiser 807252Q4 - 3668
$40.60$49.29Unit price /UnavailableSHERWOOD PUMP
Sherwood Pump - Impeller Kit w/Gaskets - 10615K
$46.84$52.19Unit price /UnavailableSIERRA
Sierra - Sierra 3147 Water Pump Kit - Mercruiser 817275Q - 3147
$159.07$160.19Unit price /Unavailable
Lower Unit, Cooling & Transmission Components Resources and Information
The lower unit of your outboard engine contains many essential components responsible for propelling your boat through the water. It also houses the transmission and cooling components. Maintaining and replacing these vital engine parts is important for ensuring functionality for years to come. PartsVu’s selection includes Water Pump Repair, Impellers, and Cooling, Thermostats, and Lower Unit & Transmission Components.
Looking for more marine products for your boat and outboard engine? Browse PartsVu’s products and accessories or aftermarket engine parts.
Lower Unit, Cooling & Transmission Components FAQs
How do I service my 4-stroke Mercury outboard lower unit?
Use an appropriately sized screwdriver assisted by a wrench if necessary to loosen these screws which should be pretty tight. An impact driver and hammer might be needed. If the drain screw has a magnetic tip, inspect the plug after removal to see if heavy deposits exist. Some fine shavings are normal, but chunks or a large quantity of metal is cause for further inspection. Have a drain pan ready, and extra rags handy as gear lube will begin running down the skeg as soon as you remove the upper vent plug. Be sure to collect the used gaskets from both plugs after removal as these are not reusable and should be discarded.
Allow several minutes with the engine tilted all the way down to drain all the old gear oil fully. Like your engine oil, inspect the spent oil for evidence of water intrusion, other contamination, or metal. If you have purchased one of PartsVu’s handy lower unit oil change kits, you will already have new gaskets, oil, and a pump. Screw the pump into the lower drain hole, then connect it to the container of gear oil.
Begin pumping oil into the Mercury lower unit until oil begins to flow from the vent plug at the top. Stop pumping and wait a few minutes for all the air bubbles to work themselves out of the gearcase. After this brief pause, pump a few more times until clean gear oil without bubbles is flowing from the vent plug. With a fresh gasket in place, install and torque the top vent plug. Unscrew your fill hose from the lower drain plug and quickly swap in the lower drain plug with a new gasket — torque to spec.
How do I service my Yamaha outboard lower unit?
Yamaha lower unit gear lube is drained by removing the lower drain screw first and then the upper plug vent to allow air in. On most models, both plugs are clearly visible on the lower unit, but on models with low water pickups, the forward pickup will need to be removed to access the drain plug. Use a properly sized screwdriver assisted by a wrench if necessary to loosen these screws which should be pretty tight. An impact driver and hammer may be needed depending on who serviced your engine last. The drain screw has a magnetic tip, so inspect the plug after removal to see if heavy deposits exist. Some fine shavings are normal, but chunks or a large quantity of metal is cause for further inspection. Have a drain pan and extra rags handy as gear lube will begin running down the skeg as soon as you remove the upper vent plug. Be sure to collect the fiber gaskets from both plugs after removal, as these are not reusable and should be discarded.
Allow several minutes with the engine tilted all the way down to fully drain the old gear oil. Like your engine oil, inspect the spent oil for evidence of water intrusion or other contamination or metal. If you have purchased one of PartsVu’s handy lower unit oil change kits you will already have new gaskets, oil, and a pump. Screw the pump into the lower drain hole and then connect it to the quart of Yamalube gear oil or HD gear oil depending on your model. Begin pumping oil into the lower unit until oil begins to flow from the vent plug at the top. Stop pumping and wait a few minutes for all the air bubbles to work themselves out of the gearcase. After this brief pause, pump a few more pumps until clean gear oil without bubbles is flowing from the vent plug. With a fresh fiber gasket in place, install and torque the top vent plug. Unscrew your fill hose from the lower drain plug and quickly swap in the lower drain plug with a new gasket. Torque to spec and re-install the lower water pickup screen if applicable.
How do I maintain my outboard engine lower unit?
The gears inside your lower unit are constantly turning, and the only protection they have is the lower unit lubricant you use. Its job is to form a micro-thin film between the metal component parts to keep them from actually touching. Under the large loads, these gears exert, proper lubrication requires extreme resistance to pressure, foaming, and molecular shear. And, since the lower unit operates underwater, its lubricant also has to be capable of maintaining necessary lubricity even when a significant amount of water is present, should some leak inside. Ordinary gear lubricant can’t do all of this; so always avoid automotive or tractor gear oils. Use a quality, marine-based formula, like Yamalube Marine Gearcase Lube. It can perform all of these required protection and lubrication duties, even with a full 10% of water present. There’s even an HD formula, to meet the special needs of Yamaha’s top-of-the-line V MAX SHO, 4.2L V6 Offshore, and 5.3L F350 V8 outboard lower units.
Visually inspect the exterior of your lower unit for any signs of damage every time before you go out. If you fish, it’s a good idea, every fifty hours or so (or when necessary whichever occurs first), to remove the propeller and check for any fishing line or other debris that may be wrapped around the propeller shaft, which can cut into prop shaft seals and potentially allow water to enter the gearcase. If found, visually inspect the prop shaft seals for damage or leakage. Then check the color of your lower unit lubricant by cracking the “drain screw” on the bottom of the bullet and the “vent screw” on the side of the lower unit. Allow a small amount to drain into a clean container. If the lubricant is milky in color, you’ve got water in the lubricant. Have the lower unit seals inspected by your Yamaha Marine dealer through a pressure test, and if necessary, have the seals replaced. Pressure testing a lower unit is best performed by an authorized Yamaha Marine dealer, because depending on findings, it may be necessary to disassemble the lower unit for further inspection.
Since you are in the neighborhood – take the opportunity to lube your prop shaft, bearings, and any other wear points – Yamalube Marine Grease is good – use it!
Yamaha recommends replacing your lower unit lubricant after the first 20 hours for a new outboard, then every 100 hours after that. Also, if it’s milky in color or smells or looks burnt when you’re checking it, it’s time for a change. To do it yourself, place a pan under the bottom drain screw, remove the screw, and then remove the upper vent screw on the side of the lower unit. Allow all of the lubricant to drain into the pan. While you’re waiting, check the drain screw. It’s magnetic, so any metal particles or shavings present in the lubricant will be attracted to it. Fine metallic dust is normal, but if you find larger chips of metal on the screw or in the pan as the lubricant drains, have your local Yamaha Marine dealer check for possible internal damage. Also at this time, replace the small crush washer present on each screw (commonly known as “drain plug gaskets”). If you don’t see one, it may still be adhering to the outboard. Use a pick to pull it free, as these must be located, discarded, and replaced each time these screws are removed.
Once all the lube has drained, refill the lower unit by threading the appropriate fitting into the lower unit drain screw opening (on the bottom of the bullet) and slowly pumping in fresh Yamalube Marine Gearcase Lube or Lubricant HD. Once you see this new fluid seeping out of the upper vent screw hole, stop and wait 5 minutes, then very slowly continue pumping until it seeps from the vent screw again. At this point, replace the vent screw with a new crush washer installed, and tighten it according to manufacturer specifications. Remove the fitting attached to the drain screw opening, and quickly re-install the drain screw with the new crush washer installed. Tighten to factory specifications.
PartsVu stocks a wide selection of lower unit, cooling and transmission components to fit your outboard engine’s exact specifications. Browse a range of marine products from leading manufacturers, including Sierra, Panther, Handiman, Moeller, Lubrimatic, Star-brite and more. PartsVu guarantees fast shipping, great prices, and information resources to help you find the right part every time.


