
A properly functioning water pump impeller is crucial for the cooling system of your Mercury outboard engine. Over time, impellers wear out, leading to reduced water flow and potential overheating. Changing the Mercury outboard water pump impeller at regular intervals ensures your outboard motor runs efficiently and prevents costly repairs. This step-by-step guide covers everything you need to know about how to change the impeller, making the process easy—even for beginners.
In the video embedded within this article, the water pump impeller change was performed on a Mercury Verado 300. However, the video and the step-by-step instructions included within this article apply to:
- Verado L4 Models, from 135 to 200 HP
- Verado L6 Models, from 200 to 400 HP
- 4-Stroke EFI Models, from 40 to 150 HP
With practical advice, expert tips, and clear instructions, you can soon change your outboard water pump impeller like a pro, ensuring your engine remains cool, efficient, and in top-notch condition.
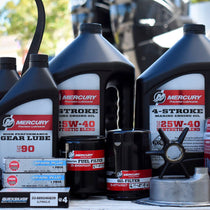
What You’ll Need for the Job


We also recommend rags or shop towels. Additionally, PartVu’s Mercury water pump repair kits include replacement water pump impellers.
Why Changing an Impeller in Your Mercury Outboard is Crucial?
Failure to replace a worn-out impeller can have several serious implications. The impeller, as part of the cooling system in an engine, plays a vital role in ensuring the engine operates at optimum temperatures. When the impeller is worn out, it can’t cool the engine sufficiently, potentially leading to overheating. Overheating can cause significant engine damage, which could incur substantial repair costs.
Moreover, a malfunctioning impeller may also negatively affect the engine’s overall performance. Over time, these issues can compound, leading to decreased lifespan of the engine and other connected systems. In addition to the financial consequences, there’s also a safety risk; a sudden engine failure due to an overheated engine could leave you stranded or in a hazardous situation, especially when navigating on water or in remote areas.
When to Replace the Impeller on an Outboard Motor?
The standard Mercury outboard water pump impeller replacement recommendation is every three years or after every 300 hours of operation, whichever comes first. Replacement is an essential preventive measure to ensure the motor operates efficiently and to prevent unexpected system malfunctions.
However, specific symptoms might necessitate an earlier inspection of the impeller. Overheating, decreased water flow from the telltale hole, diminished cooling system efficiency, and reduced engine performance are all signs that the impeller might be worn or damaged. These warning signals are essential to heed as they could help you avoid more serious engine problems in the future.
Sticking to a regular maintenance schedule is crucial to keep the water pump impeller and the entire engine cooling system in optimum condition. But remember, even with a three-year or 300-hour guideline, any abnormalities or potential issues should be addressed as soon as they surface.
How to Change the Impeller on a Mercury Outboard Motor: Step-by-Step Guide
To change the impeller on an outboard motor, first remove the lower unit, then take off the water pump housing to access the old impeller. Replace it with a new one, ensuring correct orientation, and reassemble everything securely. This prevents overheating and maintains efficient engine cooling.
You’ll need the following:
- Water pump impeller
- Mercury 2-4-C Grease
- Socket wrenches
- Needle-nose pliers
- Screwdrivers
- Bungee cords
- Rags or shop towels
Regular maintenance on your Mercury outboard water pump is crucial for proper functioning. Here’s a step-by-step guide on how to change the water pump impeller:
1. Remove the Lower Unit (Gear Case)
- Begin by removing the anode.
- Use bungee cords or a suitable method to secure the gear case.
- Remove the mounting bolts.
- Use a rubber mallet to gently tap on the gear case to separate it from the rest of the outboard to avoid damage to the anti-ventilation plate.
- Disconnect the speedo tube using needle-nose pliers. Use a pinch-and-roll method to remove the tube slowly.
- Place the lower unit in a suitable workspace to access the rest of the steps in the process.
2. Remove the Housing
- Next, remove the rubber collar from the top of the water pump assembly.
- Remove the four bolts that hold the water pump assembly in place
- Gently pry off the housing.
- Take note of the condition of the seals for potential replacement.

3. Replace the Impeller
- Use a water pump repair kit suitable for your Mercury outboard motor.
- Remove the old plates and gaskets at the base of the impeller.
- Position the new plates and gaskets using the old ones as a reference for direction and alignment.
- Install the new impeller. Line up the new impeller according to the old one’s orientation.
- Apply grease to the bolts for easier removal in the future.
4. Reassemble
- Reattach the housing. Rotate the driveshaft clockwise to ensure the impeller blades correctly orient within the housing.
- Align the holes with the bolts.
- Gradually tighten the bolts, following torque specifications. Set torque to light setting or hand tighten them with a wrench. Be careful not to overtighten.
- Remember to reinstall the collar washer to prevent water leakage.
- Prepare the gear case studs by cleaning them first before applying grease.
- Carefully maneuver the gear case back into position, aligning the drive shaft first, then the shift shaft. You may have to remove the side cowling to allow easier access to the shift shaft.
- Reconnect the speedo tube using needle nose pliers.
- Secure the gear case by reinstalling the washers and nuts and then tightening the nuts evenly.
Changing a Mercury outboard water pump impeller is a crucial maintenance task that ensures your outboard motor’s longevity and optimal performance. By following the step-by-step instructions in this guide, you can confidently tackle this task and easily replace the impeller.
Remember to gather the necessary tools, pay attention to safety precautions, and take your time to remove the old impeller and install the new one carefully. Regularly inspecting and replacing the water pump impeller will help prevent overheating issues, maintain proper water flow, and ultimately prolong the life of your Mercury Outboard motor.
**Important Note**
Always consult your engine’s owner’s manual for instructions and information specific to your engine. If you need clarification on changing a water pump impeller, consult a Mercury Marine-certified mechanic.
PartsVu and Platinum Mobile Marine Partnership
Thanks to Frank Cutri, the owner and operator of Platinum Mobile Marine, a mobile mechanic service serving the Lee County, Florida area, for partnering with PartsVu on the Boat Maintenance Matters series.
Together, we are working hard to build a library of step-by-step instructions on common outboard motor repair and maintenance tasks.


3 comments
Thank you for the response, I have been able to slip the lower case up into the upper housing. With motor ignition turned to the off position, I am now able to shift lever at Helm thru all 3 positions, forward, neutral and reverse with no abnormalities through the helm shifting while manually turning propeller to each position . When starting and running motor in forward , then shifting back to neutral then waiting for prop to stop spinning , then raising the RPM to around 1000rpm in reverse , there seems to be a clacking sound coming from the lower unit. Is this normal at this rpm with water supplied with ears attached to the lower case assembly ?
( boat is on trailer ) thank you for any reply
Dear Juan,
Thank you for reaching out to us regarding the difficulty you encountered after replacing your impeller/housing kit. It sounds like you’ve been diligent in following the process, and marking the selector rod was a wise step to ensure accurate reassembly.
Based on your description, it seems there may have been a slight misalignment or shift in the gear selector rod when you were reinstalling it into the upper housing. Here are a few steps you can take to troubleshoot and potentially rectify the situation:
Recheck the Gear Selector: Firstly, ensure that the helm gear selector is indeed in the neutral position. Sometimes, even slight movements can take it out of true neutral.
Inspect the Markings: Recheck the marking you made on the selector rod. When you align the selector rod back into the upper housing, ensure the marking aligns perfectly with where it was when removed.
Prevent Prop Movement: Although you’ve taped the prop to the housing, double-check to ensure it hasn’t moved. Any movement can misalign the internal gears, making it difficult to properly set the selector rod.
Slight Adjustments: If the gear housing assembly slipped into place only after you adjusted the shifter shaft, it’s possible that the internal gears are now slightly misaligned. Try gently rotating the propeller while attempting to shift the gear selector at the helm. This may help the internal gears find their correct positions.
Visual Inspection: If possible, you might want to do a visual check. Open the gear housing slightly and check to see if everything is lining up as it should be, especially in relation to the marking you made.
Consult a Mechanic: If you’ve tried the above steps and still face challenges, it might be best to consult with a local marine mechanic or technician. They might be able to offer hands-on help and ensure everything is aligned and functioning properly.
Lastly, I would advise against forcefully trying to shift the gears, as it could lead to damage. Gentle and slight movements, along with patience, are key here.
I hope these steps prove helpful. Please let us know how it goes, and if you have any further questions or issues, don’t hesitate to reach out. We’re here to help!
Best,
Mario
Excellent instructional video ! I just replaced my impeller/ housing kit as mentioned. Before proceeding with the project, I placed gear selector at the helm in the neutral position. after impeller/housing replacement, I have difficulty lining up the gear selector rod into the upper housing. I had marked the selector rod at the location when removed with a permanent pen. The prop was taped to housing to prevent it from moving. unfortunately the gear selector at helm won"t shift forward, only towards reverse. The gear housing assembly slipped into place only after I manuvered the shifter shaft slightly. Any advise would be helpful for my difficulty with it .Thank you for any reponse