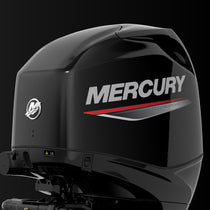
This guide will walk you through removing and reinstalling a Mercury outboard propeller. While this guide focuses on common Mercury models 70hp+, and the demonstration video features a Mercury Verado 300, the propeller removal and reinstallation process is similar across many different outboard motors.
This guide will prove beneficial for boat maintenance, including prop cleaning and replacement; however, always check your owner’s manual for parts and procedures applicable to your specific engine.
What You’ll Need for the Job
You’ll Also Need:
- Pliers
- Screwdrivers
- Mallet/Hammer
- Block of Wood
- Disposable Gloves
When and Why to Remove Your Mercury Outboard Propeller
Removing your outboard propeller is necessary for several reasons:
- Routine maintenance
- Repairs
- Changing the prop
Important routine maintenance tasks, such as greasing the propeller shaft, changing the anode, or inspecting the seal, requires prop removal. Damages to the propeller, such as bends or cracks, also require propeller removal for replacement or repair.
Additionally, changing the propeller is common for boaters looking to increase performance or fuel efficiency. However, it’s essential to note that propeller removal should only be attempted by individuals with knowledge and experience in propeller removal and installation. Incorrect removal or installation can lead to damage or injuries.
If you’re not confident in your abilities, it’s best to consult a professional technician. Always follow the owner’s manual instructions for propeller removal to avoid any damage to the engine or propeller. Properly removing the propeller at the right time ensures that the boat’s maintenance is up-to-date, durable, and safe. In addition, inspecting and removing the propeller regularly can increase your engine’s lifespan and maintain your boat’s top performance.
How to Remove & Reinstall a Mercury Outboard Propeller
You’ll need the following:
- Mercury Precision Grease
- Propeller nut kit (if necessary)*
- Socket set (according to the size specified in your owner’s manual)
- Pliers
- Screwdriver
- Mallet/hammer
- Block of wood
- Disposable gloves
The specific tools required for your boat propeller removal and reinstallation may depend on your engine model and manufacturer. It’s always best to consult your owner’s manual or seek professional assistance if unsure.
*The propeller nut kit linked above applies to Mercury/Mariner 70 HP+ outboards (non-Flo‑Torq II). Consult your owner’s manual or Mercury schematics to ensure you select the correct parts for your specific engine.
Steps for Removing and Reinstalling a Mercury Outboard Propeller
Removing an Outboard Propeller:
- Using a screwdriver and mallet, fold back the tabs on the lock washer (tab washer), securing the propeller nut.
- Wedge a wood block between the propeller and the ventilation plate to prevent it from turning.
- Use the appropriate socket size to unscrew the propeller nut and remove the propeller from the prop shaft.
- Inspect the thrust washer for wear, replace it if necessary, and remove any debris or fishing line tangled around the prop shaft.
Reinstalling a Mercury Outboard Propeller:
- Apply marine grease to the prop shaft and install the new or existing propeller.
- Next, apply marine grease to the prop shaft and install the new or existing propeller.
- Last, apply marine grease to the prop shaft and install the new or existing propeller.
Important Checks After Outboard Propeller Re-Installation
After reinstalling your boat propeller, it’s imperative to perform several essential checks before heading out to ensure your safety and the proper performance of your boat.
First, visually inspect the propeller and its attachments to ensure everything is correctly installed and tightened per your owner’s manual. Finally, engage the boat in forward and reverse gears, ensure the boat responds as expected, and listen for unusual noises or shaking. If you notice any irregularities or concerns, dock the boat and seek professional assistance before heading out.
The Importance of Carrying a Spare Prop
Carrying a spare propeller for your boat is a wise investment that can save you time, money, and hassle. Propeller malfunctions are common, making it a good idea to carry a backup propeller on board.
Having a spare propeller readily available can also prevent the cancellation of a fishing trip or ruin a day with friends and family on the water. You can quickly replace a malfunctioning prop using the tips above and safely return to the shore by carrying a spare propeller and the right tools.

**Important Note**
Always consult your engine’s owner’s manual for instructions and information specific to your engine. If you need clarification on removing and reinstalling an outboard propeller, consult a Mercury Marine-certified mechanic.
PartsVu and Platinum Mobile Marine Partnership
Huge thanks go to Frank Cutri, the owner and operator of Platinum Mobile Marine, a mobile mechanic service serving the Lee County, Florida area, for partnering with PartsVu on the Boat Maintenance Matters series.


