Fuel system maintenance is essential to keeping your Yamaha boat running smoothly and avoiding costly repairs. A clean, efficient fuel system supports strong engine performance and prevents long-term damage. Reliable fuel delivery is a must, whether cruising, fishing, or towing water toys.
Issues like hard starting, hesitation, and power loss are often caused by fuel-related problems—many of which stem from ethanol-blended fuel, water intrusion, or debris buildup. Fortunately, routine inspections and essential maintenance can prevent most of these issues.
This guide outlines the key steps to keeping your Yamaha boat’s fuel system in top shape—from inspecting components and cleaning filters to preventing contamination and preparing for storage.
Inspecting the Fuel System
Regular visual inspections are your first line of defense against fuel system issues. By taking a few minutes before or after each outing to check major fuel components, you can catch minor problems early and avoid larger ones down the line.
- Check Fuel Lines
Fuel lines degrade over time due to heat, vibration, and exposure to fuel blends with ethanol. Begin by inspecting all visible fuel lines from the tank to the engine. Look for signs of cracking, brittleness, bulging, or fuel seepage. Lightly squeeze the hoses to feel for soft spots, which may indicate weakening rubber.
Pay particular attention to any connections or bends in the line—these are the most likely points for leaks to form. If any damage is found, replace the affected section with Yamaha-approved marine-grade fuel hose or other Yamaha parts built for ethanol resistance.
- Inspect the Fuel Tank
Your fuel tank should be free of contaminants like dirt, water, or sediment. Using a flashlight, look into the tank (through the filler neck or inspection port, if available) and check for cloudiness or debris settling at the bottom. Any visible water or gunk may point to moisture intrusion or aging fuel.
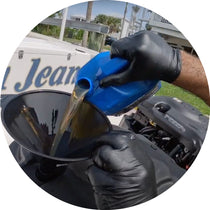
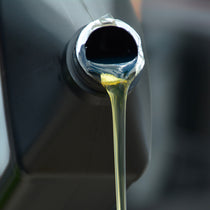
If you detect contamination, drain the fuel tank completely and clean out any debris before refilling with fresh fuel. Avoid topping off with old fuel—if it’s been sitting for several months, it’s better to start fresh. Always use clean, high-quality gasoline from a trusted source to reduce the risk of contamination.

- Examine the Fuel Cap for a Proper Seal
A worn or damaged fuel cap seal can allow air or moisture into the tank, leading to fuel oxidation and water contamination. Remove the cap and inspect the rubber gasket underneath. If it looks dry, cracked, or misshapen, replace it. Also, ensure the cap itself tightens firmly and doesn’t show signs of corrosion or looseness.
Maintaining a tight seal helps preserve fuel quality and keeps the fuel system pressurized, which is essential for proper delivery to the engine.
Cleaning or Replacing the Fuel Filter
Fuel filters act as the gatekeeper of your fuel system. They trap dirt, rust, and other particles that can clog injectors or damage your engine. Over time, the filter becomes less effective and needs to be cleaned or replaced.
-
Locate the Fuel Filter
In most Yamaha boats, the fuel filter is located between the fuel tank and the engine. Some models may also have a second filter near the fuel pump or engine block. Check your owner’s manual to identify all filters and their exact location.
-
Remove and Inspect the Filter
Turn off the engine and close any fuel valves before removing the filter. Once removed, examine the filter for signs of clogging or discoloration. Hold it up to a light source—if you can’t see through it or fuel doesn’t flow freely, it’s time to replace it.
If your boat uses a clear bowl-style water-separating filter, check the bottom for water or debris. Many of these models have a drain at the bottom, so you can empty water without removing the entire filter.
-
Replace or Reinstall
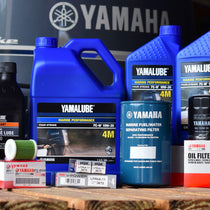
If your filter is in good condition, reinstall it securely. Be sure to tighten all clamps and fittings to prevent leaks. If replacing the filter, use only Yamaha-approved parts to ensure compatibility and performance. After installation, prime the fuel system if necessary and start the engine to confirm proper operation.

Maintaining the Fuel Injectors or Carburetor
The fuel injectors or carburetor deliver the precise air-fuel mixture your engine needs to perform efficiently. When dirty or clogged, these components can cause rough idling, poor acceleration, stalling, and reduced fuel economy.
- Use a Fuel System Cleaner
Using a Yamaha-recommended fuel system cleaner is a simple and effective way to keep injectors or carburetor jets clean. Add the correct amount to a full fuel tank and let the engine run for 10–15 minutes to circulate the cleaner through the system. Regular use—especially after storage periods—can prevent buildup and maintain consistent fuel delivery.
- Manual Cleaning When Needed
If you notice continued performance issues such as sputtering or hesitation, it may be necessary to manually clean the injectors or carburetor. This more advanced cleaning process typically involves removing the components, soaking them in an appropriate solvent, and gently scrubbing with a soft brush or compressed air.
If uncomfortable with this process, consult a certified Yamaha marine technician for inspection and cleaning.
- Reassemble and Test
Once cleaned, reinstall the components and double-check all fittings. Start the engine and allow it to idle for a few minutes. Listen for smooth operation, and perform a throttle test to confirm improved performance. Any unusual behavior may require further inspection.
Preventing Water Contamination
Water is one of the most damaging elements that can enter your fuel system. Even small amounts of moisture can lead to poor combustion, internal corrosion, and injector failure. Thankfully, with a few smart habits, you can significantly reduce the risk of water intrusion and keep your fuel system running clean and efficient.
One of the most effective tools is a water-separating fuel filter. Most Yamaha boats are already equipped with one, but if yours isn’t, it’s worth installing. These filters are designed to catch and isolate water before it reaches the engine, preventing severe damage. Make it a habit to check the filter bowl regularly for water accumulation and drain it whenever needed. Some systems include sensors that alert you when water is detected—never ignore these warnings. Failing to act can result in significant engine trouble and expensive repairs.
Proper fuel storage also plays a significant role in keeping moisture out. Before storing your boat, always add a marine-grade fuel stabilizer to prevent gasoline breakdown. Store any extra fuel in sealed, ethanol-safe containers designed to limit condensation. When possible, keep your boat’s fuel tank full during storage. Leaving it partially filled creates more airspace, which increases the chance of moisture forming due to temperature changes.
If you suspect your fuel is already contaminated with water—perhaps the engine is sputtering, stalling, or producing white smoke—stop running the engine immediately. It’s essential to drain the fuel tank completely, flush the system, and refill with fresh, clean gasoline. You may also need to replace the fuel filter and inspect the injectors to ensure no lasting damage has occurred.
By staying proactive and following these simple steps, you can help protect your engine from water-related issues and enjoy more time on the water with peace of mind.
Checking the Fuel Pump
The fuel pump plays a critical role in your Yamaha boat’s performance by pressurizing and delivering fuel from the tank to the engine. If the pump begins to fail, you may experience symptoms like hard starts, loss of power, or inconsistent fuel delivery. Identifying these signs early can help prevent more serious issues on the water.
To check if the pump is working correctly, start by turning the ignition key without starting the engine. You should hear a faint whirring or humming sound—this is the fuel pump priming the system. If you don’t hear anything, the pump may not be operating correctly, or there could be an issue with the fuel pump relay.
Next, examine the fuel pump and its connecting hoses closely. Use a clean, dry cloth to wipe down all fittings and connections. If you detect any fuel residue, dampness, or a strong fuel odor, you may have a leak. It’s essential to address even minor leaks immediately, as they impact fuel efficiency and pose a serious fire hazard.
If the pump is noisy, erratic, or completely unresponsive, it’s likely time for a replacement. Always choose a Yamaha-compatible fuel pump to ensure proper fit and function. If you're uncertain, it's a good idea to have a professional test the fuel pressure and confirm whether the pump is the root of the issue.
Regular fuel pump inspection ensures your boat receives consistent fuel flow, helping maintain smooth, dependable engine performance.
Seasonal and Long-Term Storage Tips
Fuel maintenance doesn’t stop when the season ends. Proper storage procedures prevent fuel-related issues when you’re ready to get back on the water.
-
Add Stabilizer and Run the Engine
Before storing your Yamaha boat, fill the fuel tank and add a marine-grade fuel stabilizer. Start and run the engine for 10–15 minutes to ensure the stabilized fuel circulates through the system, which prevents varnish and gum buildup during storage.
-
Consider Draining Fuel for Long-Term Storage
If you plan to store the boat for several months and are unsure about the fuel’s freshness, consider draining the fuel system completely. Check your model’s manual to confirm whether this step is required.
-
Pre-Season Inspection
When taking the boat out of storage, fully inspect the fuel system. Look for cracked hoses, stale fuel, water contamination, or unusual smells. Replace the filter, check the tank, and test-start the engine before your first trip.
Frequently Asked Questions (FAQ)
How often should I replace the fuel filter?
Replace the fuel filter every 50–100 hours of engine operation, or at least once a year. If you frequently boat in rough water or store the boat for long periods, consider more frequent replacement.
How can I tell if my fuel system is being contaminated by water?
Symptoms include sputtering, poor throttle response, rough idling, or an engine that won’t start. Visual signs include cloudy or milky fuel and water droplets in the separator bowl.
Should I run my fuel tank empty before storing my boat?
If storing for a short period, keep the tank full with stabilized fuel. Consult your manual for long-term storage (several months)—some systems benefit from being drained entirely.
Final Thoughts
A clean and efficient fuel system is the foundation of dependable boating. By checking key components regularly, addressing minor issues early, and storing your fuel properly, you’ll keep your Yamaha boat running at peak performance all season long.
Even a few basic steps—like using fuel stabilizer, replacing filters, and inspecting for water—can go a long way in protecting your investment and avoiding mid-season surprises. Refer to your owner’s manual for model-specific details, and don’t hesitate to call a Yamaha-certified marine technician if needed.
Taking care of your Yamaha Boat fuel system means more time enjoying the water and less time dealing with repairs. With consistent care, your Yamaha boat will be ready to launch whenever you are.