A Yamaha outboard primary fuel filter is critical for maintaining the engine’s performance and efficiency. The filter screens out dirt, debris, and other contaminants, ensuring only clean fuel is burned. Over time, the fuel filter can become clogged or damaged, leading to decreased engine performance and fuel efficiency and potentially causing engine damage.
Understanding how to change the fuel filter on your Yamaha outboard motor is essential for ensuring the longevity and optimal performance of the engine. Performing this maintenance task does not require specialized knowledge, and it is a task that many boat owners can complete themselves with some basic equipment and a little time.
In this guide, we will walk you through the step-by-step process of changing a Yamaha outboard fuel filter, helping you to keep your motor running smoothly and efficiently. We’ll cover everything from locating the fuel filter to safely replacing it with a new one, ensuring your outboard engine continues to operate at peak performance.
The video and detailed guidance provided in this article are relevant to the following Yamaha outboard models:
- F150
- F175 / F200
- F200 / F225 / F250 3.3L V6
- F225 / F250 / F300 4.2L V6
- F350 V8
- VF150 / VF175
- VF200 / VF225 / VF250
What You’ll Need for the Job
The Importance of Regularly Changing Your Yamaha Outboard Fuel Filter
Below are the main reasons and the crucial importance of regularly changing the fuel filter in your Yamaha outboard motor:
- Ensure Peak Engine Performance: A clean fuel filter allows an efficient fuel flow, ensuring that your engine operates at peak performance. A clogged fuel filter restricts fuel supply to the engine, leading to decreased performance and efficiency.
- Prevent Engine Damage: Dirt, debris, and other contaminants can harm your engine. Regularly changing the fuel filter prevents these harmful particles from entering the engine, avoiding potential damage and costly repairs.
- Improve Fuel Efficiency: A new fuel filter ensures optimal engine performance, leading to better fuel efficiency. A clogged fuel filter makes the engine work harder, consuming more fuel and increasing expenses in the long run.
- Extend Engine Lifespan: Regularly changing the fuel filter is a simple maintenance task that can significantly contribute to the longevity of your Yamaha outboard motor. It helps keep the engine in top condition, ensuring it serves you reliably for years.
- Avoid Unexpected Breakdowns: A clogged fuel filter can lead to sudden and unexpected engine breakdowns. Regular replacement helps avoid inconvenient and potentially hazardous situations, ensuring smooth and uninterrupted boating experiences.
Changing a Yamaha Outboard Primary Fuel Filter: When is it Time for a Change?
It’s essential to recognize the right time to change your Yamaha outboard fuel filter to ensure your boat’s engine’s continuous health and efficiency. Pay attention to the following scenarios, as they may hint at the need for a new fuel filter:
- Engine Issues: If your engine frequently stalls or misfires, it could indicate a clogged fuel filter obstructing proper fuel flow.
- Decreased Fuel Economy: Have you noticed a significant drop in fuel efficiency? A decreased efficiency may indicate a blocked fuel filter, forcing the engine to work harder and increasing fuel consumption.
- Starting Difficulties: An engine that is hard to start can signal a fuel filter issue, preventing the necessary fuel reach for smooth operation.
- Loss of Engine Power: Are you experiencing a decline in engine power, especially during acceleration? Power loss could highlight the need for a fuel filter change.
Timely attention to these signs will ensure your Yamaha outboard engine’s consistent operation and extended lifespan.
Determining the Replacement Timeline for Your Yamaha Outboard Fuel Filter
The timeline for changing the Yamaha Outboard Fuel Filter can be influenced by multiple factors, including how often the boat is used, the fuel quality used, and the particular recommendations for your specific Yamaha model.
- Usage: If your boat is regularly used, consider changing the fuel filter yearly or after every 100 hours of operation, whichever comes first.
- Fuel Quality: If you’re navigating areas known for unreliable fuel quality, you may need to replace the fuel filter more frequently. Proactive maintenance helps mitigate the risk of engine damage linked to contaminated fuel.
- Model-Specific Guidelines: Do not overlook the value of referring to your Yamaha owner’s manual, which will offer guidance tailored to your specific model.

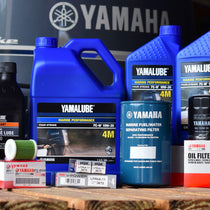
Required Materials for Fuel Filter Replacement
Below is a comprehensive list of items you’ll require for the task:
- Correct Fuel Filter: Purchase the appropriate fuel filter for your specific Yamaha Outboard model.
- Used Filter Container: Have a designated container or bag to properly dispose of the old filter.
- Fuel Filter Wrench: The correct wrench will assist in efficiently removing and replacing the fuel filter.
- Protective Gear: Ensure you have gloves and safety glasses to shield your hands and eyes from accidental fuel splashes.
- Clean Cloths: Keep these nearby to wipe away any fuel spills and clean the filter housing area before the new installation.
Steps for Replacing a Fuel Filter in a Yamaha Outboard
Replacing the fuel filter is straightforward yet essential. By diligently following the steps outlined below, you can enhance the performance and longevity of your Yamaha outboard motor.
- Unplug the Water Sensor: Gently unplug the water sensor to prepare for the fuel filter removal.
- Loosen the Housing Cover: Unfasten the bolts on the fuel filter housing to access the filter.
- Remove the Cover: Take off the cover to expose the fuel filter housing.
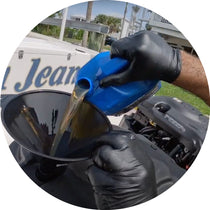
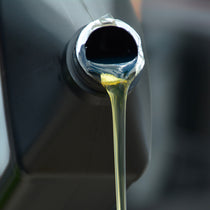
- Prep for Drainage: Position a rag beneath the fuel filter housing to catch any fuel spillage.
- Detach the Fuel Filter Housing: Utilize a wrench to dislodge the fuel filter housing.
- Extract the Old Fuel Filter: Carefully remove the old fuel filter from its housing.
- Insert the New Fuel Filter: Position the new fuel filter into the housing.
- Secure the Housing: Realign and fasten the housing securely with a wrench.
- Reattach the Cover: Put the cover back onto the fuel filter housing.
- Reconnect the Water Sensor: Ensure the water sensor is plugged back in to complete the process.
Changing the fuel filter in your Yamaha outboard motor is an essential maintenance task that ensures your engine’s efficiency, performance, and longevity. Following the comprehensive and detailed steps outlined above, you can effectively and safely replace the fuel filter, ensuring your Yamaha outboard motor’s uninterrupted and optimal operation.
Remember to stay vigilant for signs that your fuel filter needs replacement and adhere to the recommended schedule for changing the filter, as outlined in your Yamaha owner’s manual. Your proactive attention and care will contribute significantly to a smoother and more reliable boating experience, allowing you to enjoy your time on the water with peace of mind.
Important Note
Always consult your engine’s owner’s manual for instructions and information specific to your engine. For clarification on changing a fuel filter, consult a Yamaha-certified mechanic.
PartsVu and Platinum Mobile Marine Partnership
Huge thanks to Frank Cutri, the owner and operator of Platinum Mobile Marine, a mobile mechanic service serving the Lee County, Florida, area, for partnering with PartsVu on the Boat Maintenance Matters series.
Together, we are working hard to build a library of step-by-step instructions on common outboard motor repair and maintenance tasks.