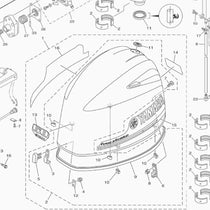
Changing the oil in your Yamaha outboard motor is a crucial maintenance task that extends the life of your engine and ensures it runs smoothly and efficiently. Regular Yamaha outboard oil changes protect your investment by preventing excessive wear and tear and keeping the engine components well-lubricated under all operating conditions.
This guide will walk you through the step-by-step process of performing an oil change on a Yamaha outboard motor. These instructions are designed to help you complete the task quickly and safely, ensuring your outboard is ready for reliable performance on the water.
This video, along with the detailed steps provided below, applies to the following Yamaha Outboard models:
- VF200
- VF225
- VF250
Why Is Changing Your Outboard Oil Important?
Changing the oil in your outboard motor is not just a routine maintenance task; it's essential for several reasons. Here are the key benefits of regular oil changes for your outboard engine:
- Engine Protection: Fresh oil lubricates the engine's moving parts, reducing friction and wear, helping to prevent damage, and extending the motor's life.
- Prevent Contaminants: Old oil can accumulate contaminants that cause corrosion and decrease engine efficiency. Regular oil changes remove these harmful substances.
- Maintain Performance: Clean oil ensures optimal performance. It helps maintain engine efficiency, resulting in smoother operation and better fuel economy.
- Avoid Engine Failures: Regular oil changes keep the internal components in good condition, reducing the risk of engine failures and costly repairs.
- Preserve Boat Value: A well-maintained engine supports the overall value of your boat. Consistent maintenance, including oil changes, can enhance resale value.
By understanding the importance of this maintenance task, you can ensure your outboard motor remains in excellent condition and provides years of reliable service.
How Often Should You Change the Oil in Your Boat Motor?
Determining the right frequency for changing the oil in your boat motor is crucial for maintaining its longevity and performance. Here are some general guidelines to help you establish a regular maintenance schedule:
- Manufacturer’s Recommendations: Always start by consulting your owner’s manual. Manufacturers provide specific intervals based on engine type and model, ranging from every 50 to 100 hours of operation.
- Type of Use: Consider how you use your boat. Engines used in frequent short trips, high-performance applications, or dirty conditions may require more frequent oil changes.
- Seasonal Changes: If you use your boat seasonally, it's advisable to change the oil at the beginning and end of the boating season to ensure the engine is protected during periods of non-use.
- Visual and Physical Checks: Monitor the color and texture of the engine oil. Dark, gritty, or milky oil can indicate contamination or other problems requiring more frequent changes.
Tools and Supplies Needed for Yamaha Outboard Oil Maintenance
Having the right equipment and materials is essential to change the oil in your Yamaha outboard motor. Here's a list to help you prepare:
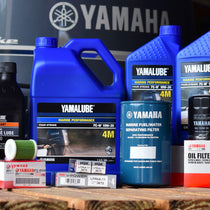
- Yamaha Outboard Oil Change Kit: Everything you need in a handy kit.
- Yamaha Outboard Engine Oil: If you prefer not to purchase a Yamaha oil change kit.
- Yamaha Outboard Oil Filter: If you prefer not to purchase a Yamaha oil change kit.
- Oil Filter Wrench
- Protective Gloves
- Funnel
- Oil Extraction Pump
- Oil Collection Pan
- Cleaning Rags
How to Change Oil in a Yamaha Outboard: A Complete Guide
Prepping for the Oil Change:
Ensure that your Yamaha outboard is positioned on a flat surface before you begin. This setup helps facilitate a smooth and clean oil change process.
Removing Old Oil:
A siphon pump extracts the old oil through the dipstick hole, directing it into an oil collection pan. Ensure the siphon hose is straight to ensure smooth and efficient oil removal, allowing for the maximum extraction of old oil.
Replacing the Oil Filter:
As the oil drains, locate and remove the oil filter using an oil filter wrench. Even though the new filter may come pre-lubricated, additional grease may be applied for better sealing. Check and clean any salt deposits near the filter housing with a rag. Fit the new oil filter by hand until it is tight, then give it a final twist with the Yamaha oil filter wrench without over-tightening.
Adding New Oil:
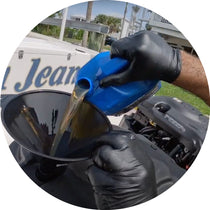
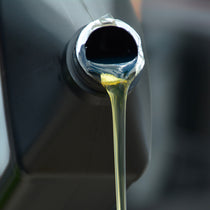
Locate the oil fill cap after the old oil has been fully siphoned. Refer to the owner’s manual for the correct quantity of oil needed. Place a funnel in the fill hole and carefully pour in the specified type and amount of Yamalube Marine Engine Oil.
Final Clean-Up:
Properly dispose of the old oil and filter. Check with local automotive stores or marinas, as many offer recycling services for used oil.
Wrapping it All Up
Regularly changing your Yamaha outboard motor oil is crucial for maintaining its performance and extending its lifespan. By following these detailed steps—from preparing your work area to disposing of used materials responsibly—you ensure that your motor runs efficiently and remains in excellent condition. Taking the time to perform this crucial maintenance task protects your investment and enhances your boating adventures. Regular oil changes are an easy yet essential way to ensure your outboard continues to operate at peak performance, keeping you ready for the water anytime. In addition to oil maintenance, PartsVu is here for all your Yamaha outboard parts needs.
**Important Note**
Always consult your engine’s owner’s manual for instructions and information specific to your engine. If you need clarification on performing an oil change, consult a Yamaha-certified mechanic.
PartsVu and Platinum Mobile Marine Partnership
Huge thanks to Frank Cutri, the owner and operator of Platinum Mobile Marine, a mobile mechanic service serving the Lee County, Florida, area, for partnering with PartsVu on the Boat Maintenance Matters series.
Together, we are working hard to build a library of step-by-step instructions on common outboard motor repair and maintenance tasks.


