
When it comes to maintaining the peak performance of your Yamaha engine, ensuring that the water pump is in optimal condition is crucial. The water pump is vital in cooling your engine by circulating water throughout, preventing overheating and potential engine damage. Over time, wear and tear or debris can impair the water pump’s functionality, necessitating timely repair or replacement.
This guide is designed to walk Yamaha owners through the steps involved in diagnosing issues with their water pump, understanding the components involved, and performing repairs or replacements. Following these instructions can restore your water pump’s efficiency, safeguard your investment, and ensure countless hours of enjoyable and safe watercraft operation.
The video and detailed guidance provided in this article are relevant to the following Yamaha outboard models:
- F225 4.2L V6
- F250 4.2L V6
- F300 4.2L V6
Diagnosing Issues with Your Yamaha Outboard Water Pump
Detecting problems with your boat motor’s water pump early on is critical to preventing more extensive and costly repairs. If you suspect an issue with your Yamaha boat motor’s water pump, the following steps will help you diagnose its condition:
- Listen for Unusual Noises: A failing water pump may emit odd noises, such as grinding or squealing, indicating worn-out components or impeller issues.
- Check for Overheating: Monitor the motor’s temperature. A malfunctioning water pump can lead to overheating, as it fails to circulate cooling water properly.
- Inspect Water Flow: Observe the water flow from the cooling system’s outlet. A reduced or erratic flow might signal a clogged intake or a damaged impeller.
- Physical Inspection of the Pump: If possible, visually inspect the water pump directly. Check the impeller for wear, damage, or debris hindering its movement or effectiveness.
- Impeller Condition: The impeller is crucial for water circulation. Wear, tears, or distortion of the impeller blades significantly reduce the pump’s efficiency.
- Check the Intake Grate: Ensure the intake grate is clear of debris. Blockages here can restrict water flow to the pump, mimicking pump failure.
- Pump Housing Inspection: Examine the water pump housing for cracks, damage, or corrosion affecting the pump’s ability to function correctly.
These diagnostic steps can help identify common issues with your Yamaha motor’s water pump. Addressing these issues promptly will help maintain your motor’s performance and reliability, ensuring you can enjoy your time on the water safely and without interruption.
Repairing a Water Pump–What You’ll Need for the Job
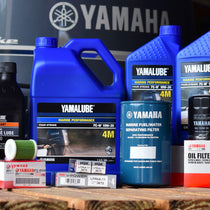
Before repairing the water pump on your Yamaha outboard, you must arm yourself with the appropriate tools and supplies. Below is a comprehensive list of the necessary items you’ll need to ensure a successful seal replacement:
- Yamaha outboard water pump repair kit
- Yamalube Marine Grease
- Rags
- Socket set
- Flathead screwdriver
- Mallet with chisel
- Cleaning supplies
- Driver
- Awl

Step-by-Step Guide: Replacing Your Yamaha Outboard’s Water Pump
- Remove the components of the lower unit to access the water pump.
- Disassemble the pump by unscrewing the bolts with a driver to detach the housing.
- Use a flathead screwdriver to pry off the housing from the shaft.
- Discard the old mounting bolts.
- Tap out the cup housing using the flathead screwdriver.
- Inspect the housing for any damage, particularly melting due to engine overheating.
- Remove the O-rings with the flathead screwdriver.
- Slide the impeller off the shaft.
- Hand-insert new dowels into their positions, then secure them with a mallet.
- Position the new gasket.
- Slide the new plate over the shaft until it is in place.
- Manually insert the new woodruff key, then secure it using a mallet and chisel.
- Mount the impeller onto the shaft, ensuring it fits snugly onto the plate.
- Apply grease to the mounting bolts on the small plastic plate, then reinstall it.
- Extract the old seals from the housing with an awl, then install and grease the new seals. Make sure the seals are oriented correctly (facing upwards), and press them into place using a socket.
- Reattach the plastic cap to the housing.
- Generously grease the housing with Yamalube Marine Grease, especially in the trough where the O-ring sits.
- Install the metal cup, ensuring the dowels align for a secure lock. The cup should sit flush after installation.
- Apply grease to the trough atop the metal cup, then install the O-ring.
- Lubricate the threads of the water pump housing’s mounting bolts.
- Reinstall the housing over the shaft using a towel to grip it for easier handling.
- While holding the shaft, turn it clockwise and press down on the housing to secure it in place.
- Tighten the mounting bolts with the driver.
- Reassemble the lower unit components.
While demanding, repairing the water pump of your Yamaha outboard motor is essential for maintaining your boat’s performance and longevity. You can ensure a successful repair by following the detailed steps outlined in this guide, from gathering the necessary tools and materials to carefully disassembly and replacing the water pump.
Patience and attention to detail are your best allies in this process. Whether you’re an experienced DIYer or new to outboard motor maintenance, this guide aims to empower you with the knowledge and confidence needed to tackle water pump repairs, ensuring your Yamaha outboard continues to provide reliable service on the water for years.
Important Note
Always consult your engine’s owner’s manual for instructions and information specific to your engine. For clarification on repairing a water pump, consult a Yamaha-certified mechanic.
PartsVu and Platinum Mobile Marine Partnership
Huge thanks to Frank Cutri, the owner and operator of Platinum Mobile Marine, a mobile mechanic service serving the Lee County, Florida, area, for partnering with PartsVu on the Boat Maintenance Matters series.
Together, we are working hard to build a library of step-by-step instructions on common outboard motor repair and maintenance tasks.


1 comment
Thank you for the video on the water-pump replacement
———
PartsVu replied:
Hi Antonio,
Thank you for reading and for your feedback on the water pump replacement video! We’re glad you found it helpful.
Best Regards Markine