
Replacing a Yamaha outboard propeller involves removing the cotter pin, prop nut, washer, and old prop, then inspecting the shaft, greasing it, installing the new prop, and securing it with a new cotter pin. Always turn the engine off and remove the safety lanyard before starting.
Maintaining your boat’s performance and ensuring a smooth ride on the water requires attention to various components, including the propeller. Whether you’re replacing a propeller or conducting periodic inspections and maintenance, knowing how to replace a Yamaha outboard propeller is a fundamental skill every boat owner should master. In this guide, we’ll walk you through a step-by-step process to safely and effectively change the propeller on your Yamaha outboard motor.
What You’ll Need for the Job


5 Reasons to Remove Your Yamaha Propeller
Propellers play a pivotal role in the performance and efficiency of your Yamaha outboard motor. There are times when removing the Yamaha outboard propeller becomes not just advisable but essential. Here are five key reasons to consider taking off your Yamaha propeller:
1. Upgrading to a New Model
As technology and designs advance, newer Yamaha propeller models may offer improved performance or better suit your boating needs. Upgrading to a newer or different propeller can enhance speed, fuel efficiency, or the overall boating experience.
2. Routine Inspection
Regularly checking your propeller for signs of wear, cracks, or damage is crucial. A visual inspection can reveal issues that impact performance or pose potential risks for more significant damage.
3. Maintenance and Cleaning
Marine growth, corrosion, or accumulated debris can affect your propeller’s function. Periodic removal allows for a thorough cleaning, ensuring that your propeller remains in optimal condition and functions efficiently.
4. Repairing Damage
Propellers can suffer from dents, bent blades, or other damage from underwater debris or accidents. Removing the propeller is the first step in addressing these issues through repair or replacement.
5. Winterization or Long-Term Storage
Removing the propeller is often advisable if you’re storing your boat for an extended period or preparing it for winter. Removing the propeller allows for proper storage, ensures it isn’t exposed to the elements, and makes it easier to service other outboard motor parts.
In conclusion, while your Yamaha propeller is built to last, it’s essential to recognize the situations when removal is beneficial. Removing the propeller can be a proactive step toward maintaining your boat’s performance and safety, whether for upgrading, inspecting, cleaning, repairing, or preparing for storage.
How to Change a Yamaha Outboard Propeller: A Step-by-Step Guide
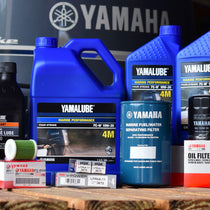
To perform this job, you’ll need:
- A propeller nut wrench or large adjustable wrench
- Yamalube Marine Grease
- A block of wood or propeller holder
- New cotter pin (if needed)
- Pliers
- Safety gloves and safety glasses
1. Prepare the boat
Make sure the ignition is OFF and the key is removed to prevent any accidental startups.
2. Remove the cotter pin
Look at the end of the propeller shaft. You will see a cotter pin. Use needle-nose pliers or a similar tool to straighten and pull out the cotter pin. Consider a new cotter pin if your current one looks dated or worn out.
3. Position the block of wood
Place a wood block or specialized propeller holder tool between the blades and the anti-cavitation plate to prevent the propeller from spinning while working on it.
4. Loosen and remove the propeller nut
Using the propeller nut wrench or an adjustable wrench, turn the propeller nut counterclockwise (left) to loosen and remove it.
5. Remove the old propeller
Pull the propeller straight out from the shaft with the nut and washer removed. If the propeller is stuck, wiggle it gently from side to side while pulling to free it. Clean old lubrication from the shaft using a paper towel or rag.
6. Remove the thrust washer
There is typically a thrust washer located behind the propeller. Slide it off the shaft and set it aside.

7. Lubricate the shaft
Apply a small amount of marine grease to the propeller shaft to make it easier to install the new propeller and help prevent corrosion.
8. Replace the thrust washer
Slide the thrust washer back onto the shaft in front of the propeller.
9. Install the propeller
Reinstall the old propeller or install the new propeller onto the shaft, ensuring it sits correctly on the splines. Make sure it’s fully seated against the thrust hub or spacer.
10. Tighten the propeller nut
Thread the propeller nut onto the shaft by hand. Use the block of wood or propeller holder to keep the propeller from spinning. Tighten the nut using the propeller nut wrench or adjustable wrench. Ensure the nut is tight, but be careful not to overtighten it.
11. Insert the cotter pin
Slide the cotter pin through the hole in the propeller shaft. Once it’s through, bend its ends in opposite directions to secure the nut in place.
12. Double-check your work
Make sure everything is tight and properly secured. Spin the propeller by hand to ensure it moves freely without any obstructions.
Always remember to check the propeller periodically for damage, entanglements, or wear and replace it as necessary.
Final Word
Your propeller is the heart of your Yamaha’s propulsion system. As with any vital machinery, it demands regular attention, inspection, and care. Recognizing when and why to remove your Yamaha propeller is a testament to proactive boat ownership. By prioritizing propeller maintenance, from routine checks to necessary replacements, you preserve your motor’s longevity and ensure every voyage is as smooth, efficient, and safe as possible.
PartsVu is proud to offer propellers and the full range of other Yamaha outboard parts needed to maintain your engine for years to come.
**Important Note**
Always consult your engine’s owner’s manual for instructions and information specific to your engine. If you need clarification on changing a propeller, consult a Yamaha-certified mechanic.
PartsVu and Platinum Mobile Marine Partnership
Huge thanks go to Frank Cutri, the owner and operator of Platinum Mobile Marine, a mobile mechanic service serving the Lee County, Florida area, for partnering with PartsVu on the Boat Maintenance Matters series.
We are working hard to build a library of step-by-step instructions on common outboard motor repair and maintenance tasks.


1 comment
Test Test Test