It’s that time of year again, and unfortunately, it’s time to store your boat for the season. While it’s always a bit more fun to pull out your boat than to put it away, properly winterizing your Mercury outboard engine avoids engine damage and will facilitate a smooth start to the beginning of next season, especially if there are any telltale signs, for instance, you notice engine oil leaking.
If you’re wondering how to winterize a Mercury 4-stroke outboard boat motor, the same basic process applies–just be sure to follow the manufacturer’s service manual for stroke-specific steps.
How do you winterize a Mercury outboard motor?
To winterize a Mercury outboard motor, flush the engine with fresh water, add fuel stabilizer and run the motor, fog the cylinders, change engine and lower unit oil, and disconnect the battery. These steps protect the outboard from freezing, corrosion, and fuel system damage during winter storage.
TL;DR: How to winterize a Mercury outboard
To winterize a Mercury outboard motor:
- Flush the engine with fresh water
- Add fuel stabilizer and run the motor
- Drain old fuel if needed and change engine oil and filter
- Fog the engine to protect internal metal surfaces
- Change lower unit gear oil and check for water contamination
- Disconnect and protect the battery for storage
These steps help prevent corrosion, fuel problems, and freeze damage so your Mercury outboard is ready to start next season.
Winterizing a Mercury Outboard Engine: Complete Step-by-Step Guide
Proper winterization prevents water trapped in the cooling passages from freezing and cracking the block or lower unit, stops internal metal parts from rusting, and keeps ethanol fuel from separating and damaging injectors and carburetors. Even if your Mercury outboard is stored indoors or in a mild climate, hidden water pockets and untreated fuel can still cause expensive springtime failures.
This winterization guide is based on recommendations from certified Mercury Marine technicians and official service manuals. Always consult your owner's manual before performing DIY maintenance.
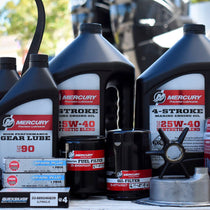
Shop Featured Products for Winterizing Your Mercury Marine Engine
While there are several things you can do before storing your boat to get a jump on next season—like changing your oil, changing your fuel-water separating filter, inspecting your internal engine components, and maybe touching up some scratches on your cowling cover—these apply when learning how to winterize a 2 cycle outboard motor properly, especially Mercury models.
The core winterization steps are similar for both 2-stroke and 4-stroke Mercury outboards–flush, stabilize fuel, fog, change oil, and protect the battery. The main differences are:
- 2-stroke Mercury outboards rely more on fogging and fuel system protection, since oil is mixed with fuel or injected.
- 4-stroke Mercury outboards also need crankcase oil and filter changes as part of winterization, along with careful checks of valve train and lubrication systems.
Always follow your specific Mercury owner’s manual for stroke-specific procedures.
- Thoroughly flush your engine
- Stabilize your entire fuel system
- Fog your outboard engine
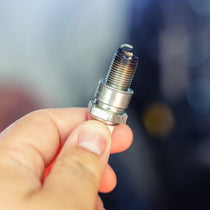
- Change your spark plugs
- Change lower unit engine oil
- Disconnect your lead acid batteries
Flush your Mercury outboard engine
You’ll need:
- Motor flusher(tool motor flushing muff)
- Garden hose
- Water supply
It’s important to thoroughly flush your engine to remove any salt buildup if you are a saltwater boater, or general mud and grime if you are a freshwater boater. Failure to remove this debris can cause or contribute to corrosion in the engine. If you’re a saltwater boater, salt crystals in the lower unit can cause a great deal of damage.
If your Mercury outboard has a hose adapter, simply screw the hose into the port, turn on the water and let it run for about 5 minutes.
Next, remove the cowling cover and look for any salt or grime build-up that may have settled outside any engine components. If you spot any build-up, simply rinse it away.
Finally, tilt the engine all the way up, then trim it all of the ways down to make sure every drop of water drains from the engine.
**Caution**
Do not run the engine when flushing while using a hose port. This method is solely designed for flushing while your engine is entirely off.
Flushing Your Outboard with the Engine Running
To flush your late model mercury outboards with the engine running, you will use a motor flusher (also known as earmuffs). Screw your garden hose onto the motor flusher, then slide the motor flusher over the engine’s water intake. You must be sure that the earmuffs are completely covering the water intake. Using this flushing method, you will turn on the engine. But first, make sure that you have a good water supply and that water is coming out on both sides of the earmuffs.
Start the engine and make sure that water is flowing from the tell-tale. Assure that your engine is not overheating by holding your hand under the tell-tale water stream. It should not be uncomfortable to hold your hand in the stream of water. If the water is excessively hot, water is not flowing correctly, and you are overheating your engine—turn off the engine, reposition the earmuffs, and start again.
Stabilize Your Fuel System
You’ll need:
- Fuel stabilizer suitable for long term storage
- Motor flusher
- Garden hose
- Water supply
Because it is so common, many of us use ethanol-enriched gasoline much of the time when it comes to winter storage. We recommend using a fuel stabilizer all of the time when running ethanol-enriched gasoline. Read our Ethanol Gasoline In Outboard Engines article to learn why. Additionally, it is vital to use a fuel stabilizer like Mercury Quickstor when your boat will be sitting unused for any more than two or three months.
Add the amount of fuel stabilizer directed on the product’s packing to your fuel tank—for instance, if the engine will be stored for 2 or more months, per the outboard owner's manual recommendation, you will want to add 1 ounce of Mercury Quickstor for every 5 gallons of gasoline.
Run the engine with stabilized fuel for 10-15 minutes to thoroughly circulate fresh oil throughout your entire fuel system. If your boat is out of the water, follow the Flush Your Outboard with the Engine Running procedures detailed above.
It is also recommended to change the engine oil and oil filter on a regular basis. You should also replace stale fuel if any. This averts any possibility of accumulation of any contaminants and acids in the old oil that cannot harm the engine while in storage.

Fogging Your Engine
You’ll need:
- Fogging oil
- Crescent wrench
- Replacement spark plugs
- Motor flusher
- Garden hose
- Water supply
So, what is fogging oil or fogging fluid anyway?
When fogging a boat motor, especially a 2-stroke Mercury engine that coats the engine and prevents corrosion. As you work through this process, you will soon understand why this process is called fogging the engine as there will be plenty of white smoke.
Since you will not be in the water while performing this task, you will need to use a motor flusher to keep the engine cool while you complete the fogging process. Follow the Flush Your Outboard with the Engine Running procedures detailed above.

If applicable, remove your engine’s air cleaner to get to the carburetors or cylinder air intakes.
Rev the engine to a bit above idle, and with the engine's fuel system running, spray the fogging oil into the carburetor(s) or air intake of each cylinder.
Continuously spray fogging oil into your engine’s carburetors until the engine stalls. Don’t spray too much oil at Continuously spraying fogging oil into your engine’s carburetors or cylinder air intakes until the engine stalls. Be sure to spray a coating of fogging oil into each cylinder or carburetor. Don’t spray too much oil at once and kill the engine immediately, but after a continuous spray, the engine will eventually stall. This is precisely what you want, and the ultimate stalling indicates that the engine is thoroughly covered with fogging oil.
Next, use your crescent wrench to remove the spark plugs and spray fogging oil directly into each cylinder. Turn the flywheel to move the cylinders allowing you to coat the entire cylinder wall. Rather than turning the flywheel to move the cylinders, you can also simply start the engine for just a few seconds to allow the fogging oil to coat the cylinder walls–repeat this process a couple of times for good measure. Replace old spark plugs with new spark plugs so that you are ready to go in the spring.
Change Lower Unit Oil
You’ll need:
- Sufficient quantity of lower unit oil / gear lube oil
- Gear lube/oil pump (for getting oil back into the lower unit)
- 2 new drain screw gaskets
- Large flat head screwdriver
- A few rags
We strongly recommend changing your lower unit motor oil before storage to make sure that there is no water in the lower unit’s oil. Any water in the oil could freeze, expand, and crack your lower unit. Also, changing lower unit oil means one less thing to do at the beginning of next season.
Locate the lower and upper lower-unit gear oil drain holes. With your drain pan in position, first, remove the lower drain screw. The oil will start to drip out into the drain pan.
Next, remove the upper drain screw—oil will drain out quickly. Allow the oil to drain completely.
It is essential that you pay close attention to your lower unit’s oil. If the oil is a milky color, there is water in the lower unit, and you will have significant problems down the road. If this is the case, go directly to your marine mechanic to diagnose the problem and hopefully fix the issue before it causes more damage.
With the waste oil properly drained, screw in your pump fitting and attach the pump. Remove the cap of your bottle of lower unit oil and screw the pump onto the bottle.
Pump until oil begins flowing out of the upper drain hole.
Install a new lower-unit drain gasket onto your upper screw plug. Insert the upper screw plug, hand tightens, then tighten securely with your flathead screwdriver.
Install a new lower unit drain gasket on your lower screw. With the lower screw in your hand, remove the gear oil pump fitting. Quickly insert and tighten the lower screw.
Wipe everything down and properly dispose of your old oil lower unit oil.
**Caution**
There must be no water in your lower unit oil. If there is water in the lower unit oil and your boat is in winter storage, the water in the oil will freeze and crack your lower unit, which is definitely a bad thing.
Disconnect Your Battery
You’ll need:
- Battery terminal cleaner and protector
Disconnect your battery and spray a corrosion inhibitor on your battery terminals before winter storage.
Common mistakes when winterizing a Mercury outboard
- Not fully draining the cooling system before freezing temperatures
- Skipping fuel stabilizer or not running the engine long enough to circulate it
- Forgetting to fog cylinders on 2-stroke engines
- Ignoring milky gear oil, which indicates water in the lower unit
- Leaving the battery connected and unmaintained all winter
Avoiding these mistakes can save you from cracked blocks, seized components, and premature wear.
Frequently Asked Questions
Do outboards need to be winterized?
Yes, both 2-stroke and 4-stroke outboard motors require winterization to prevent engine damage.
How do you winterize a Mercury outboard?
To winterize a Mercury outboard, flush the engine with fresh water, add fuel stabilizer and run the motor, drain or treat any old fuel, fog the engine, change engine and lower unit oils, and disconnect the battery. Always follow the steps in your Mercury owner’s manual for your specific model.
Do I need to winterize my Mercury outboard if it’s stored indoors?
Yes. Even indoor storage can allow trapped water to freeze and fuel to break down. Winterization prevents internal corrosion, cracked components, and fuel system issues regardless of where the boat is stored.
Can I winterize a Mercury outboard without running it?
You can drain the cooling system and protect some components without running the engine, but for best results you should run the motor on a flusher to circulate stabilized fuel and, where applicable, antifreeze. Always follow Mercury’s recommended procedure.
How long does it take to winterize a Mercury outboard?
Most DIY Mercury outboard winterizations take about an afternoon, depending on your experience and whether you’re also changing oil, gear lube, and spark plugs.






7 comments
With todays high energy ignition systems you should never turn engine over with starter without giving the spark a path to ground! So either the plugs should be placed into plug wire and grounded on engine or ignition kill lanyard lanyard pulled. Without giving spark a path damage can occur to ignition components.
Also directions state to start engine with plugs removed. It should say to bump engine with starter.
[…] it comes time to winterize your engine as part of essential maintenance for Yamaha, Mercury outboard motors, Mercruiser engines, and Suzuki outboards, a fuel stabilizer eliminates the need to drain fuel […]
I have a 2014 Mercury 90 HP 4 stroke Model 1F904131D. With it being EFI, is there a need for fogging? I have heard no, stating that it could damage sensors and such. What do you recommend?
I am running a 2021 Merc 20 horsepower fuel injected motor with about 8 hours of run time on it. I will do a engine oil change soon and then store it fot the winter. What is the better engine oil to use in this motor – 10 / 40 conventional or 10 / 40 fully synthetic ? Which oil is best to use to help finish off the break in period on this motor ? Thanks.
Based on advice from my marine mechanic who owns the dealership and was a Mercury Marine engineer for 4 years: Being in Wisconsin I charge my 3 batteries to full with my on board charger, remove them and put them in my basement before the winter freeze up. You can use a maintenance/float charger but if you have lead acid batteries make sure to add distilled water to the cells as needed. When I used an additive called Thermoil to my two 31 series deep cycle Trojan lead acid trolling motor batteries I got over 9 years out of them. My mechanic removes rhe batteries from all of the boats stored at his facility and NEVER just plugs in the on board charger on any boat for the winter. He said he has seen too many batteries ruined by multi stage digital on board chargers that were supposed to idle down to a trickle charge.