
Performing Yamaha F115 100-Hour Maintenance
We're glad to see that Maintenance does matter to you. This article is designed to serve as a guide for Yamaha F115 100-hour maintenance. Let’s get started!
Parts and Tools Needed for Yamaha F115 100-Hour Maintenance
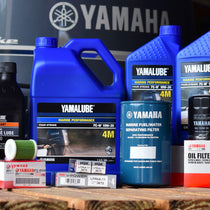
The specific parts needed for Yamaha F115 maintenance are included within our Yamaha F115 Maintenance Parts Chart.

Tools Needed for Yamaha F115 100-Hour Maintenance
- Drain pan
- Oil extraction pump - click to view oil extraction pump options
- Filter wrench
- Socket wrench
- 10, 12, 14 mm Sockets
- Spark Plug Socket, 5/8 or 13/16
- Pliers
- Protective glasses
- Oil funnel
- Shop towel
- Oil absorbent pad
- Rubber gloves
Let's Get Started Performing Your Yamaha 100-Hour Maintenance
Staging Area
It is important to place your engine over a non-porous surface like a concrete driveway before beginning service. This is important because you are protecting the environment from any potential spills going right into the ground; secondly, you can find dropped parts much easier than searching in grass or sand. Finally, perform the service either under a cover or when you are sure there will be no rain. Water intrusion into your fuel or oil system is simply no good.
Gather your tools, make sure your parts are laid out and accessible, and put on your protective glasses and rubber gloves. Rubber gloves shield your hands from harmful effects of chemicals and oils just as protective glasses protect your eyes from any splashes or errant parts flying. To organize your parts and tools, a portable tool bench or the lowered tailgate of a pickup truck is quite helpful.
Inspect or Replace Spark Plugs

We do spark plugs first as there is no sense in doing a complete 100-hour service on a boat with a blown engine. The spark plug inspection and compression test will tell you if there are more serious issues that need to be assessed before moving forward.
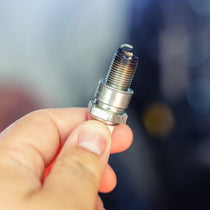
First, remove spark plug caps from each of the four plugs. Then take spark plug socket wrench loosening each and removing. Remember, “lefty loosey / rightey tightey." As you pull out the spark plugs, note the condition of each. If one spark plug appears to have any of the following characteristics, it might be a sign you need to take the engine in to be evaluated:
- Carbon build-up causing misfiring
- The electrodes are worn and rounded
- Deposits – can cause abnormal combustion and melting of the electrodes of the spark plug and engine damage
- Overheated – insulator of the spark plug is pure white, and top of the spark plug is degraded.
Be sure to note which spark plugs your engine requires--PartsVu recommends NGK. You will need four spark plugs - view the Yamaha F115 Maintenance Chart to select the correct plugs.
Spark plug part numbers ending in a dash and then two numbers (-xx) are already set with the proper gap. We recommend a pre-gaped NGK spark plug rather than trying to gap the plugs yourself. NGK spark plugs designated with a letter “R” as BKR7HS-10 have incorporated a resistor to minimize radio frequency interference (RFI). If your engine specifies an “R” styled spark plug, you must use it. Some engines are also equipped with resistor spark plug caps designed to reduce RFI, which happens every time the ignition coil discharges. RFI negatively affects computer-equipped ignition systems, digital gauges, and radio equipment.
Re-install the spark plugs using only 18 lbs of torque so that you don't crack the porcelain shaft of the plug. Then, re-attach the spark plug wires. On the Yamaha 150 HP engine, they are numbered. On many of the V8 engines, they are split down the left and the right side with each wire only long enough to reach the designated spark plug. If your engine’s spark plug wires are not easy to identify and re-attach in the correct order, use some masking tape attaching the tap to the wire and number it so that you can find the correct order after you are finished. When installing the wires, listen for a definitive “click."
Oil & Oil Filter
An oil extraction pump is clean, environmentally friendly, and by far the easiest to use. These devices suck out all oil thru the dipstick port whereas the drain method can leave some oil behind. Regardless of the method you choose, having an oil absorbent pad and shop towel on hand will save you time and stains on your driveway.
Using the oil extraction pump: Remove the dipstick from the engine block, leaving the dipstick port free and clear. Place the nozzle of the oil extraction pump over the mouth of the dipstick port. Begin manually pumping oil out of the engine by pumping the handle creating the needed vacuum to extract the oil.
Once all of the oil is out of your engine, to continue completing your Yamaha F115 100-hour maintenance, remove the engine oil filter using a filter wrench. Have the shop towel and oil absorbent drop pad ready as some oil will come out when loosening the filter.
We recommend properly disposing of oil and oil filter according to your local community guidelines. Your marina may have an oil waste disposal area that can be used, or you may have to go to your local oil recycling center.
Now, take the new filter in one hand and with the other dip finger into extracted oil rubbing a light coat of oil over the seal of the oil filter. This helps to condition and prepare the seal to marry to the engine. You may hand tighten the filter onto the engine. The filter wrench is also helpful for those hard to reach areas or if your hand grip is not strong. Whichever method you use, do not overtighten.
Next, pour the proper amount of oil into your engine- Oil Capacity F115. On newer models, the amount of oil needed is near the front of the flywheel cover. Also, on this label, you will see two columns with headings of SAE and API. SAE is US oil weight standards and API is for international standards.
Let us make this easy for you – Use 10W-30 oil.
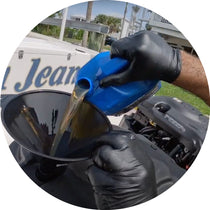
There are only two exceptions. First, you live in a year-round cold water environment (Alaska). Or secondly, you live in a year-round warm water environment (south Florida / Florida Keys). These two exceptions use 20W-40. Everyone else uses 10W-30 weight oil. Using the oil funnel, pour the proper amount of oil into your engine. Place oil cap back onto engine – hand tighten only. Remember, the dipstick is the measure by which you will know the proper amount of oil is in your engine.
Fuel-Water Separating Filter
We are firm believers in the regular replacement of fuel-water separating filters. Using the wrench, unseat the fuel water separator using a rag to catch any excess fuel that may slip out during this step. Pull the filter and inspect it.
Lightly lube the seal with marine grease so that it can be seated appropriately making a good seal to the mount. Hand tighten the filter. Do not use the wrench and torque the filter tight as this can cause damage and may cause the filter to lose the seal to the mount.
Fuel Filter
There are fuel filters on the engine block itself and depending on the dealer/manufacturer, hopefully, a 10-micron fuel/water separator system located on the boat. Today’s prevalent use of ethanol fuels has caused a variety or problems with excess water and particulates in fuel systems. To combat these problems, the installation of a 10-micron filter between your fuel tank and the engine block with its’ series of fuel filters will prevent much heartache later down the road.
Use your owner’s manual or our easy-to-use Yamaha F115 Maintenance Parts to determine the fuel filters that need to be replaced. Typically, this will include:
- Primary Filter – typically clear translucent (see-thru) white housing with a replaceable filter inside. Replace per maintenance schedule or as needed.
- Lift Pump Outlet Filter – generally a mesh style filter in a clear white housing. Typically mounted near the lift pump outlet or near the fuel VST. This filter must be replaced and cannot be cleaned. On F150, F200/225/250 engines, the filter may be covered by a black rubber boot.
- VST Filter – found attached to the inlet of the medium pressure electric fuel pump inside the VST. Remove the VST and inspect/replace the filter as directed in the maintenance schedule or as needed.
- Injector Filters – these need special care, see your dealer for service.
Fuel Additives & Lubrication

Engines are made to be run versus run occasionally with long periods of sitting; however, this is not the nature of recreational boating for many owners.
Regularly using Yamalube's Ring Free will help you to manage the damage done by your boat sitting idle. Unless you are using a marine-grade fuel, like Valvtec, sold at some marinas, you should absolutely be using Ring Free. Even if you are purchasing non-ethanol gas Ring Free is recommended with every fill-up. If you are using ethanol gas, Ring Free is a must.
T-9 Spray – Liberally spray the entire powerhead down with T-9 spray, including electrical components. T-9 helps to prevent rust and corrosion, protecting your engine from harmful elements. We also recommend spraying the entire trim and tilt unit with T-9 as a barrier against the harsh effects of water to which the trim and tilt unit is exposed.
Yamalube Marine Grease – Using a grease gun, make sure that you sufficiently grease the zyrc fittings before completing your Yamaha F115 100-hour maintenance. There are three of them: mid-section where the crankshaft meets the driveshaft and one on either side of the steering tube.
Notice & Warning
Persons who are not familiar with these or similar products produced by our manufacturers and who have not been trained in the recommended servicing or installation procedures should have the work performed by an authorized engine servicing dealer technician. Improper installation or servicing of the product could result in damage to the product or personal injury to the installer or persons operating the product.

