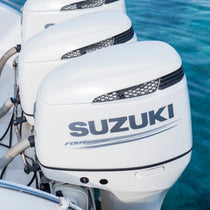
One of the most critical tasks for a new Suzuki outboard engine owner is properly breaking in the motor. Correct operation during this break-in period ensures you get the maximum life and performance from your Suzuki outboard. It cannot be skipped.
While some boaters may be apprehensive about this essential process, breaking in a new Suzuki outboard motor is relatively simple if you follow the directions below.
In this article, we’ll look at why breaking in a new Suzuki outboard motor is important, how to perform a proper break-in, and helpful information that’ll make it a cinch. Let’s begin!
Why Is Breaking In a New Suzuki Outboard Motor Important?
There are many reasons why breaking in a new Suzuki outboard motor is essential for optimal performance on the water:
Engine components seat better
Despite modern advancements in manufacturing outboard motors, manufacturing tolerances between components can stack up to be either excessively tight or loose. This means that parts that should fit perfectly may have microscopic holes or excess material that prevents efficient operation.
The new outboard break-in process wears down the high spots that result from the precision machining process to allow components to bed properly without overstressing. Some parts that require a proper break-in include piston rings and skirts, cylinder walls, and valve train components.
Without proper seating, uneven wear, leakages, excessive friction, and other potentially dangerous issues can develop. Given time, an engine that hasn’t been broken in may experience premature component wear and failure. Eventually, the engine may need a complete rebuild— a pricey proposition.

Maximizes the longevity of your Suzuki outboard
The average lifespan of a Suzuki outboard motor ranges from 1,500 – 2,000 hours if properly taken care of (including addressing all issues and maintenance intervals).
Proper break-in is critical to a new or rebuilt engine’s overall longevity. Getting it right from the beginning ensures even wear and operation within the manufacturer’s original tolerances.
Failure to properly break in a Suzuki outboard motor means that owners may need to buy Suzuki outboard parts to fix recurring issues that could have been avoided. This shortens the lifespan each time the outboard is in and out of the shop. What would have been a source of enjoyment and relaxation will become a neverending frustration as your Suzuki outboard motor misfires, needs continual adjustment, or experiences any number of performance issues.
Testing your Suzuki outboard before going out on the water
Breaking in a new Suzuki outboard motor not only helps the physical aspects of your engine, but it also helps familiarize you with the operation of the outboard. Imagine having to troubleshoot your outboard motor in rough waters when the sun’s beginning to set, and you didn’t have a baseline of performance to draw from that would have alerted you to a developing issue. Not good!
For this reason, many boating experts recommend that owners break in their engines. It allows owners to get a feel for the operation of the outboard and boat more confidently. While you can have boat mechanics perform this process for you, the ten hours it takes to break in your new Suzuki outboard motor is a small amount of time to maximize your boat’s enjoyment.
Helps maintain your Suzuki outboard warranty
Nearly every outboard manufacturer requires proper break-in to keep the warranty intact, and Suzuki is no exception. Failure to follow break-in procedures described in this article could quite possibly void your warrant. It’s a costly mistake that can be easily prevented!
Refurbished motors require a break-in period
While this article is geared toward new Suzuki outboard motors, if you’ve purchased a refurbished engine, it also requires a break-in period to ensure all replacements and repairs correctly seat. Some licensed dealers may take care of this process for you. Others either charge a fee or require new owners to handle it on their own.

How to Break In Your New Suzuki Outboard Motor
Now that you understand the importance of breaking in a new Suzuki outboard motor, it’s time to look at how to break in your engine. Don’t worry— breaking in an outboard motor is a relatively simple procedure that only requires following a few simple instructions. The entire process will take ten hours of operation. It follows a simple step-by-step process that’s broken down into several intervals:
- Initial 15 minute warmup
- The next (1) hour and 45 minutes
- The 3rd hour
- The final 7 hours
The Initial 15-Minute Warm-Up
Step 1: Idle the engine in gear for approximately 15 minutes, keeping the RPMs low. Idling allows your Suzuki outboard to warm up, preventing engine damage.
The Next Hour and 45 Minutes
Step 2: Run the boat for one hour and forty-five minutes at 3000 RPMs (or at less than ½ throttle). Do not exceed 3000 RPMs. You may throttle up beyond the recommended operating range to get your boat on plane, then immediately reduce the throttle to recommended operating range.
The 3rd Hour
Step 3: Run the boat at 4000 RPMs (or ¾ throttle) for one hour. Avoid running the engine at full throttle, and do not exceed the 4000 RPMs.
Final 7 Hours
Step 4: Operate the boat normally but do not run at full RPMs (full throttle) for longer than five minutes. It’s best to fluctuate the RPMs throughout this period.
Tips When Breaking in a New Suzuki Outboard Motor
When breaking in a new Suzuki outboard motor, the following tips will make the process easier and more successful:
- Use premium fuel during the break-in process. Better fuel will ensure a more efficient and consistent operational engine temperature.
- Use conventional oil during the break-in process and avoid using synthetic engine oil during this period. While synthetic engine oils offer better lubricity between components, the purpose of a break-in period is to wear away sources of friction.
- After the break-in, changing your oil and oil filter is important. PartsVu offers handy Suzuki outboard oil change kits to help. Changing the oil removes small metallic particles produced during the break-in process, and the oil filter will have trapped any larger particles.
Now that you know what breaking in a new Suzuki outboard motor is all about, you should know that the break-in process is only the beginning of proper engine maintenance. To help, PartsVu offers a full catalog of Suzuki outboard parts, Suzuki outboard maintenance kits, and plenty of other boat parts and boat accessories to ensure that your time on the water is always fun and exciting!


4 comments
Hello Jeff,
If the oil pressure light on your Suzuki 150 outboard engine is illuminated, it’s important to take immediate action, as low oil pressure can lead to serious engine damage. Here are some steps to follow in this situation:
1. Shut Off the Engine: First and foremost, turn off the engine immediately to prevent any potential damage or further complications.
2. Check Oil Level: Verify that the engine has the correct amount of oil. Ensure the oil level is within the recommended range on the dipstick. If it’s below the minimum level, add oil as necessary.
3. Inspect for Leaks: Look around the engine for any signs of oil leaks or dripping. Leaks could be a source of low oil pressure. If you find any leaks, address them promptly.
4. Oil Filter: Check the oil filter to ensure it’s properly installed and tightened. If it’s loose or damaged, it can cause a drop in oil pressure.
5. Oil Quality: Ensure that the oil you’ve used is of the correct type and viscosity as recommended by the manufacturer. Using the wrong oil can lead to oil pressure issues.
6. Oil Pressure Sending Unit: The oil pressure warning light may be triggered by a faulty oil pressure sending unit. Have this component inspected and, if necessary, replaced by a qualified technician.
7. Wiring and Electrical Connections: Inspect the wiring and electrical connections related to the oil pressure sensor. Loose or damaged connections can cause false readings.
8. Instrument Panel Check: It’s possible that the issue is with the instrument panel or the oil pressure gauge itself. A malfunctioning gauge can give inaccurate readings.
9. Engine Diagnostic: If you’ve checked all the above aspects and the oil pressure warning light continues to illuminate, it’s crucial to have a professional marine technician conduct a thorough diagnostic test on the engine. They can use specialized tools to measure the actual oil pressure and diagnose any underlying problems.
Keep in mind that the oil pressure warning light is a critical indicator of engine health, and it should not be ignored. Continuing to run the engine with low oil pressure can cause severe damage. Always prioritize safety and address oil pressure issues promptly to protect your engine investment.
Best,
Mario
I think that means it needs to be serviced.
Just purchased a 150 Suzuki engine on my Excel 203. The engine has now been broken in and the oil pressure light has come on???
Have just purchased a new 200hp suzuki as just at the moment getting fitted to the boat.
I did however think that being new would require running in. I’am glad i looked this up and have taken onboard the process that will have to be carried out. As i go to sea for a living, i haven’t spoken to our dealer face to face yet to get this roun down from him. Only have spoken to him via email, it’s taken more than a year to source an engine this size of horse power. many thanks for these tips, much appreciated.