The lower unit of a Mercury outboard motor plays a crucial role in transferring power from the engine to the propeller, ensuring smooth and efficient operation on the water. There are instances when removing the Mercury outboard lower unit becomes necessary for maintenance, repairs, or upgrading. Whether you’re a seasoned boater or a passionate DIY enthusiast, understanding the proper techniques and steps for removing a Mercury outboard lower unit is essential knowledge in your arsenal.
This article will provide a comprehensive guide on removing a Mercury lower unit. We’ll walk you through the necessary preparations, tools you’ll need, and step-by-step instructions to ensure a successful removal process. By mastering removing a Mercury lower unit, you can gain the confidence to tackle various maintenance tasks and enhance your boating experience.
In the video embedded within this article, the lower unit service was performed on a Mercury Verado 300. However, this article’s video and step-by-step instructions apply to all Mercury outboards.
What You’ll Need for the Job


We Also Recommend:
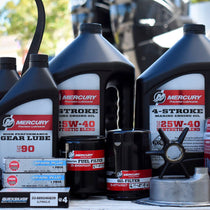
- Rags or shop towels
- Container to prevent gear oil spillage
Taking a Closer Look: Why Remove a Mercury Outboard Lower Unit?
- Routine Maintenance: Periodic lower unit removal facilitates essential maintenance tasks, ensuring your boat’s ongoing performance and efficiency.
- Inspection Purposes: Removing the lower unit allows for a comprehensive inspection, potentially uncovering minor issues before they escalate into major problems.
- Repair or Replacement: If parts of the lower unit become damaged or worn out, removal may be necessary to facilitate repairs or replacements.
- Performance Enhancement: Removal can be a part of performance enhancement processes, facilitating upgrades or modifications to the lower unit.
- Preventative Care: In some cases, preemptive removal and inspection of the lower unit can prevent future issues, providing an opportunity for preventative care.
- Cleaning: Over time, the lower unit can collect debris or other substances that can impair function. Removal allows for thorough cleaning.
Importance of Regular Maintenance of a Mercury Lower Unit
Understanding the importance of regular lower unit maintenance is vital for boat owners. A Mercury lower unit is the *heartbeat* of your boat’s propulsion system. It houses the boat’s gearbox, drive shaft, and propeller and is directly exposed to the harsh marine environment.
Regular maintenance of this essential component can yield several benefits:
- Improved performance: Regular upkeep helps keep your boat running smoothly and efficiently. It prevents the build-up of dirt, salt, or other marine debris that can hinder performance.
- Increased lifespan: Regular maintenance activities such as changing the gear oil, inspecting seals, and cleaning the unit can help extend the lifespan of your lower unit.
- Preventing costly repairs: Proactive maintenance can help identify potential issues before they become serious problems. For example, catching a leaking seal early could prevent water intrusion, which can cause extensive and expensive damage.
- Safety: The Mercury lower unit drives your boat’s propeller. Any failure in this system can pose significant safety risks. Routine inspections and maintenance can prevent such failures.
As a critical part of your boat, your Mercury lower unit requires regular attention to ensure it operates at its best. Don’t wait for a problem to arise – be proactive and make routine maintenance a part of your boat ownership duties.
How to Remove a Mercury Outboard Lower Unit: A Step-by-Step Process
You’ll need the following:
- Mercury 2-4-C Grease
- Socket wrench
- Screwdriver set
- Needle-nose pliers
- Bungee cords.
- Mallet
- Rags or shop towels
- Gear oil collection container
To remove your Mercury outboard’s lower unit, follow the steps below:
- Put the engine in reverse: Before starting the job, ensure that the engine is in reverse to line up everything appropriately. Also, the shift shaft on the gear cases is spring-loaded. Removing the gear case in neutral might spring load and go into reverse, causing potential difficulties when reassembling.
- Drain the engine oil: Getting the oil out of the engine first is essential. If you remove the gear case without doing this, the oil will fall out of the midsection, creating a significant mess.
- Ensure the gear case is secure: Utilize bungee cords or an appropriate fastening method.
- Remove the mounting bolts and washers: Be careful to remove the washers.
- Remove the lower unit: Start to pry off the gear case gently. You may need a mallet to gently tap on the gear case to separate it from the rest of the outboard. You have to be cautious with these because too much stress from the mallet could cause breakage.
- Remove the speedo tube: Use a pair of needle nose pliers to pinch and roll out the speedo tube gently.
- Prepare to reinstall the lower unit: Clean and prep the studs, removing any build-up. Grease each one to make future removal easier. You may need to remove the side cowling to access the shift shaft. It’s crucial to correctly line up the shift shaft to reinstall the gear case smoothly. The drive shaft will line up first, and then the shift shaft.
- Complete re-assembly: Equipped with the nut, washer, and needle nose pliers, complete the re-assembly process. Insert the speedo tube back in first. After everything is lined up according to step 7, put on the washer and the nut. Remember, everything should slide in perfectly, and no excessive force should be used. Something significant could break if things don’t line up and you torque on the bolts. Once you are confident that alignment is proper, tighten the nuts evenly.

Final Word: Mastering the Removal of a Mercury Outboard Lower Unit
This comprehensive guide offers valuable insights and step-by-step instructions for removing a Mercury lower unit. Following the outlined procedures, boat owners can safely and confidently disassemble and remove the unit for maintenance, repairs, or upgrades. Remember to prioritize safety, gather the necessary tools, and take time during removal. With the knowledge and guidance provided in this article, you can successfully tackle this task and ensure your Mercury lower unit remains in optimal condition.
**Important Note**
Always consult your engine’s owner’s manual for instructions and information specific to your engine. If you need clarification on how to remove a lower unit, consult a Mercury Marine-certified mechanic.
PartsVu and Platinum Mobile Marine Partnership
Huge thanks go to Frank Cutri, the owner and operator of Platinum Mobile Marine, a mobile mechanic service serving the Lee County, Florida area, for partnering with PartsVu on the Boat Maintenance Matters series.
Together, we are working hard to build a library of step-by-step instructions on common outboard motor repair and maintenance tasks.