Perform Mercury lower unit maintenance by first draining the lower unit gear lube. First, remove the lower drain screw, then the upper plug vent to allow air to enter. On some models, both plugs are clearly visible on the lower unit, but on other models, the plugs are located behind the propeller.
Shop Recommended Products

Use an appropriately sized screwdriver assisted by a wrench if necessary to loosen these screws which should be pretty tight. An impact driver and hammer might be needed. If the drain screw has a magnetic tip, inspect the plug after removal to see if heavy deposits exist. Some fine shavings are normal, but chunks or a large quantity of metal is cause for further inspection. Have a drain pan ready, and extra rags handy as gear lube will begin running down the skeg as soon as you remove the upper vent plug. Be sure to collect the used gaskets from both plugs after removal as these are not reusable and should be discarded.
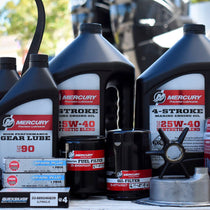
Allow several minutes with the engine tilted all the way down to drain all the old gear oil fully. Like your engine oil, inspect the spent oil for evidence of water intrusion, other contamination, or metal. If you have purchased one of PartsVu’s handy lower unit oil change kits, you will already have new gaskets, oil, and a pump. Screw the pump into the lower drain hole, then connect it to the container of gear oil.
Begin pumping oil into the Mercury lower unit until oil begins to flow from the vent plug at the top. Stop pumping and wait a few minutes for all the air bubbles to work themselves out of the gearcase. After this brief pause, pump a few more times until clean gear oil without bubbles is flowing from the vent plug. With a fresh gasket in place, install and torque the top vent plug. Unscrew your fill hose from the lower drain plug and quickly swap in the lower drain plug with a new gasket — torque to spec.


