Embarking on a DIY journey to replace the thermostat in your Yamaha outboard motor empowers you with hands-on knowledge and ensures the heart of your marine adventure stays in peak condition. A thermostat might seem minor, but it's the gatekeeper for your engine's temperature, crucial for preventing overheating or undercooling. As these components may degrade or fail over time, understanding how to swap one out becomes indispensable for any boat owner.
Below, we offer detailed guidance on the thermostat replacement process, covering everything from the necessary tools to the final adjustments, ensuring you're well-equipped to keep your Yamaha outboard motor's cooling system in top condition for unbeatable performance.
In the video embedded within this article, the thermostat replacement was performed on a Yamaha F200 outboard. However, the video and the step-by-step instructions included within this article apply to:
- F75
- F90
- F150
- F175 / F200
- F200 / F225 / F250 3.3L V6
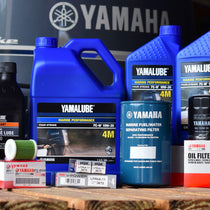
What You’ll Need for the Job
- Yamaha Thermostat
- Wrench or Socket Set
- Screwdrivers
- Clean Rags
Identifying When Your Yamaha Outboard Motor Thermostat Needs Replacement
Knowing when to replace the thermostat in your Yamaha outboard motor is crucial for maintaining optimal engine performance; here are the key signs to look out for:
- Visible Wear or Damage: Upon inspection, if the thermostat or its housing shows signs of corrosion, wear, or damage, it's time for a replacement.
- Poor Fuel Economy: A malfunctioning thermostat can lead to inefficient engine operation and increased fuel consumption.
- Overheating Engine: If your motor is running hotter than usual, it could indicate that the thermostat is not operating correctly.
- Engine Running Too Cold: Conversely, if the thermostat is stuck open, the engine may not reach its optimal operating temperature, affecting performance and fuel efficiency.
- Fluctuating Temperature Gauges: Unusual readings on your temperature gauge, such as erratic fluctuations, can indicate thermostat issues.
Understanding these signs will help you maintain your Yamaha outboard motor's performance and longevity by addressing thermostat issues promptly.

The Critical Role of a Yamaha Thermostat in Your Outboard Motor's Performance
A properly functioning thermostat is vital for the health and performance of your outboard motor; here are its essential roles:
- Optimizing Engine Temperature: The Yamaha outboard thermostat ensures the engine quickly reaches and maintains an ideal temperature for efficient operation. This precise temperature control is pivotal for optimal engine performance and longevity.
- Protecting Engine Components: By preventing the engine from operating outside its ideal temperature range, a well-functioning thermostat safeguards against excessive wear and potential failure of engine parts.
- Maximizing Fuel Economy: A thermostat that effectively manages engine temperature contributes significantly to fuel efficiency. It prevents the inefficiencies associated with engines running too hot or too cold, thus optimizing fuel use and cost savings.
- Ensuring Safety on the Water: A functional thermostat acts as a critical safety feature, averting engine overheating that can lead to fires or breakdowns, ensuring a safer boating experience.
- Stabilizing Engine Performance: A reliable thermostat contributes to the engine's smooth operation by eliminating temperature fluctuations that can impact performance, ensuring consistent power output and responsiveness.
- Extending Engine Lifespan: Regular monitoring and maintenance of the thermostat can significantly extend the life of your outboard motor by ensuring it operates within the designed temperature parameters, reducing the risk of overheating and other temperature-related issues.
Tools and Materials Required for Thermostat Replacement
- New Thermostat: Ensure it's compatible with your specific Yamaha model.
- Wrench or Socket Set: Necessary for removing and tightening bolts.
- Screwdrivers: Both flat-head and Phillips types may be needed.
- Clean Rags: For cleaning up any spills or debris.
How to Change a Yamaha Outboard Thermostat
Preparing the Engine
- Remove the Motor Cowling: Ensure the motor is off and the key is removed to prevent accidental ignition.
- Loosen the Motor Cap: Loosen the cap slightly; there's no need to remove it altogether.
Gaining Access
- Clear the Area: Remove any parts obstructing access to the thermostat housing, ensuring a clear workspace.
Removing the Old Thermostat
- Open the Thermostat Housing: Carefully remove the cover of the thermostat housing. You might need to unscrew it if screws are present.
- Note Thermostat Orientation: Observe and remember the position of the old thermostat to facilitate the correct installation of the new one.
- Remove the Old Thermostat: Take out the thermostat, preparing the space for the new one.
- Inspect and Clean Housing: Check the housing for any signs of wear, corrosion, or damage.
Installing the New Thermostat
- Install the New Thermostat: Place the new thermostat in the housing, ensuring it matches the orientation of the old one.
- Secure the Housing Cover: Reattach the cover by tightening the housing bolts or screws, if applicable. Be careful not to overtighten.
Reassembly and Completion
- Reinstall Removed Components: If any parts were removed, reinstall them now.
- Tighten the Motor Cap: Tighten the cap slowly and carefully.
- Reattach the Motor Cowling: Check to make sure it is fastened securely.
Thermostat Replacement: Conclusion and Key Takeaways
Replacing the thermostat in your Yamaha outboard motor is a straightforward maintenance task that can significantly improve your engine's efficiency, longevity, and overall performance. By following the step-by-step guide provided and using the specified tools and materials, you can ensure your motor operates at its optimal temperature, safeguarding against the risks of overheating or running too cold. Regular checks and replacements of the thermostat not only enhance your boating experience but also contribute to the health of your engine, ensuring many more enjoyable journeys on the water.
**Important Note**
Always consult your engine’s owner’s manual for instructions and information specific to your engine. If you need clarification on changing a thermostat, consult a Yamaha-certified mechanic.
PartsVu and Platinum Mobile Marine Partnership
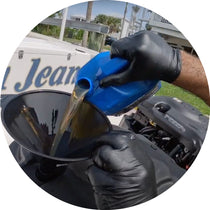
Huge thanks go to Frank Cutri, the owner and operator of Platinum Mobile Marine, a mobile mechanic service serving the Lee County, Florida area, for partnering with PartsVu on the Boat Maintenance Matters series.
Together, we are working hard to build a library of step-by-step instructions on common outboard motor repair and maintenance tasks.