Navigating the waters of maintenance for your Yamaha outboard motor doesn’t have to be daunting, especially when it comes to something as crucial as removing the lower unit. With the right guide, tools, and patience, you can ensure your motor continues running smoothly, providing reliable performance when needed. This article is designed to walk you through the entire process, from the initial preparations to the final checks, ensuring you can confidently undertake this maintenance task.
This article and the video embedded within it apply to the following Yamaha outboard models:
- F225 4.2L V6
- F250 4.2L V6
- F300 4.2L V6
What You’ll Need for the Job
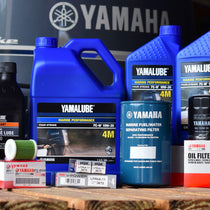
- Yamalube Marine Grease
- Driver
- Screwdriver
- Rags

Essential Insights into Gear Case Maintenance for Yamaha Outboards
Understanding the significance of gear case maintenance is crucial for any Yamaha outboard owner who wants to ensure the motor’s longevity and optimal performance. The gear case is integral to your outboard’s operation, translating engine power into propeller motion, making it one of the most critical components for efficient water navigation.
Maintenance Benefits: Regular maintenance of the gear case helps in:
- Extending the lifespan of your Yamaha outboard.
- Ensuring peak performance and fuel efficiency.
- Preventing unexpected failures and costly repairs.
Signs of Wear: It’s important to recognize symptoms of gear case issues, such as:
- Oil leaks or changes in oil condition.
- Unusual noises during operation.
- Decreased performance or efficiency.
Timely Replacement: Understanding when to replace the gear case components can save you from:
- Sudden breakdowns during use.
- Increased damage to other parts of the motor.
- Higher repair costs in the long run.
Impact of Neglect: Neglecting gear case maintenance can lead to:
- Reduced engine life.
- Lower the resale value of your outboard motor.
- Compromised safety and reliability on the water.
Supplies, Tools, and Materials:
- Yamalube Marine Grease
- Driver
- Screwdriver
- Rags
Step-by-Step Guide: Removing the Lower Unit from Your Yamaha Outboard
Removing the Yamaha Outboard Gear Case
1. Prepare the Outboard:
- Secure the outboard to ensure it’s stable.
- If the engine is trimmed up, the gear case is unlikely to fall out. However, exercise caution if it’s not sufficiently inclined.
- Shift the engine into neutral.
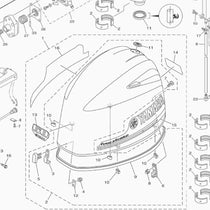
2. Removing the Lower Unit Bolts:
- Locate the eight mounting bolts securing the gear case to the outboard.
- Carefully remove each bolt using an appropriate tool (such as a driver or ratchet and socket). Keep these bolts in a safe place for reinstallation.
3. Loosening the Gear Case:
- If the gear case is stuck to the motor housing, gently use a screwdriver at a non-critical point to pry them apart.
4. Lowering the Gear Case:
- Carefully lower the gear case, maintaining a firm grip to avoid damage.
5. Complete the Removal:
- Pull the gear case straight down until it is completely free, ensuring the speedo tube is not damaged.
Reinstalling the Yamaha Lower Unit
Apply Grease:
- Apply Yamalube Marine Grease to the splines, shift shaft, water pump tube receptacle, o-ring, and the base of the drive shaft where the stabilization collar is located.
Set Shaft in Neutral:
- Turn the prop shaft to verify it is in the neutral position.
Grease All Mounting Bolts:
- Apply grease to the bolts that will be used to secure the lower unit back to the outboard.
Align the Gear Case:
- Ensure the shaft is properly aligned. First, align the drive shaft splines, followed by the shift shaft, adjusting as necessary.
- Start by hand-threading one bolt to hold the gear case in place, ensuring proper alignment.
Secure the Gear Case:
- Once aligned, securely tighten all the bolts with the driver to attach the lower unit to the outboard.
Successfully removing and reinstalling the gear case on your Yamaha outboard is a significant achievement that enhances your understanding of your vessel’s mechanics and empowers you as a boat owner. By following the detailed steps provided, from preparation and removal to greasing and realignment, you’ve taken a crucial step toward ensuring the longevity and performance of your outboard motor.
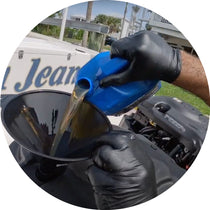
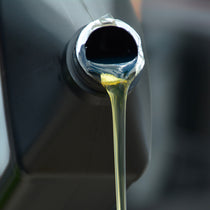
Need to change your Yamaha outboard gear lube? Check out PartsVu’s handy gear lube kits.
Important Note
Always consult your engine’s owner’s manual for instructions and information specific to your engine. For clarification on removing the lower unit, consult a Yamaha-certified mechanic.
PartsVu and Platinum Mobile Marine Partnership
Huge thanks to Frank Cutri, the owner and operator of Platinum Mobile Marine, a mobile mechanic service serving the Lee County, Florida, area, for partnering with PartsVu on the Boat Maintenance Matters series.
Together, we are working hard to build a library of step-by-step instructions on common outboard motor repair and maintenance tasks.