
Table of contents
A Yamaha outboard that won't go into gear has a problem at one of five points: the control cable or remote control, the engine-side linkage or adjustment, the shift rod alignment, the propeller hub, or the internal lower unit. The diagnostic path is straightforward if you start at the helm and work toward the lower unit – most no-gear problems are resolved before you get to the gearcase.
Two observations before any physical inspection: does the engine-side linkage reach full travel in forward and reverse when you operate the control, and does the problem appear only in one gear or both? Those two facts point directly at the most likely cause.
Safety before touching anything
Disable the ignition and remove the key before inspecting any part of the shift system. Keep everyone away from the propeller area. Do not force the control lever against resistance – forcing a jammed system bends linkage, breaks cable end fittings, and can cause unexpected engagement. If the engine is stuck in gear, running, or producing unexpected movement, shut it down and do not restart until the fault is found.
Step 1: Identify Your Engine's Control System
Yamaha outboards use different shift control architectures across model families. The correct diagnostic path depends on which system your engine uses.
Control system |
Common models |
Shift diagnosis approach |
Mechanical cable control |
Most F-series 4-stroke, most 2-stroke models, most V4/V6 naturally-aspirated |
Cable, linkage, and shift-rod checks apply directly. All procedures in this guide apply. |
Helm Master EX / Digital Electronic Control (DTS) |
Larger F-series models (F150–F425), V-MAX SHO, F350C |
Electronic shift – there is no physical shift cable. Diagnosis requires fault code reading and model-specific dealer tools. Physical cable checks do not apply. |
HPDI (High-Pressure Direct Injection) 2-stroke |
HPDI 150–300 models |
Mechanical shift control but HPDI fuel and electronic systems require model-specific service documentation. |
Digital Electronic Control (DTS / Helm Master EX) does not have a shift cable
If your Yamaha uses Helm Master EX or Digital Throttle and Shift (DTS), there is no mechanical shift cable to inspect. The system uses electronic signals from the helm control to the engine's ECU, which then actuates an electronic shift motor inside the engine. Applying cable-and-linkage diagnosis to a DTS-equipped engine will not find the fault. DTS shifting problems require fault code reading with the Yamaha diagnostic tool (YDS) and model-specific electronic service procedures. Contact an authorized Yamaha marine dealer for DTS diagnosis.


Step 2: Match the Symptom to the Diagnostic Path
Each symptom points to a different part of the system. Identify the correct path before touching anything.
Symptom |
Most likely causes |
First check |
Section below |
Won't engage forward or reverse – both directions |
Cable not reaching full travel, adjustment, shift rod, internal lower unit |
Watch engine-side linkage travel with control at forward and reverse stops |
Cable and Linkage Checks |
Engages forward but not reverse (or vice versa) |
Cable adjustment off in one direction, partial linkage travel, clutch dog issue |
Confirm linkage reaches full travel in the failing direction; compare forward vs reverse travel |
Shift Cable Adjustment |
Stuck in forward – won't return to neutral |
Cable failure, linkage jam, shift rod or clutch issue |
Disconnect cable at engine-side; try linkage by hand |
Stuck in Forward Gear |
Stalls when gear is engaged |
Low or unstable idle, throttle-shift sync off, prop/shaft drag, gearcase binding |
Fix idle first; inspect prop for line; check sync |
Stalls When Shifted Into Gear |
Vibrates in gear |
Damaged prop, bent shaft, fishing line, spun hub, loose mount, engine misfire |
Inspect prop and shaft area with engine off; check gear lube |
Vibration in Gear |
Problem appeared after impeller / lower-unit service |
Shift-rod alignment error or reassembly mistake |
Return to service manual reassembly procedure for exact model |
Post-Service Shifting Problems |
DTS / Helm Master EX – no response to control |
Electronic control fault, ECU fault, shift motor fault |
Read fault codes with Yamaha Diagnostic System (YDS) – dealer tool required |
Model identification section above |
How the Yamaha Mechanical Shift System Works
The mechanical shift chain on a Yamaha outboard has six links between the helm and the lower unit. A failure at any one link produces a no-gear or hard-shift symptom – and most failures occur in the first three links, not the last three.
Link |
Component |
Common failure mode |
1 |
Remote control / binnacle |
Internal wear, seized pivot, cable anchor corrosion – produces hard or lost control movement |
2 |
Shift cable |
Corroded inner wire, cracked jacket, stretched end fitting, insufficient free play – produces short or stiff cable travel |
3 |
Engine-side linkage and adjustment |
Worn bushing, loose pivot bolt, bent component, incorrect adjustment – produces partial travel, flex instead of movement |
4 |
Shift rod |
Incorrect position after service is the most common fault – engine appears to shift at helm while nothing engages in lower unit |
5 |
Clutch dog |
Slow engagement from drag causes grinding; worn dogs from repeated grinding cause slip under load |
6 |
Propeller and hub |
Spun hub mimics no-gear – engine revs, boat barely moves, RPM above normal WOT range |
The Critical First Check: Engine-Side Linkage Travel
- Before disconnecting anything, operate the control through its full range and watch the engine-side linkage. This single observation tells you whether the problem is upstream (in the cable and control) or downstream (in the shift rod and lower unit).
- Linkage does not reach full travel in one or both directions: the fault is in the cable or control. The lower unit and shift rod have not been ruled out but are not yet implicated. Proceed to cable and linkage checks.
- Linkage reaches full travel in both directions and the engine still does not engage: the cable and linkage are functioning. The fault is in the shift rod position, clutch, or lower unit – or the propeller hub is slipping.
- Linkage reaches full travel in one direction but not the other: cable adjustment is the most likely cause. One direction is correct; the other is short by an amount that can usually be corrected by re-adjustment.
Watch the plate and shaft – not the lever
A control lever that appears to be at full forward or full reverse can still have the linkage short of full travel if the cable has slack, stretch, or is misadjusted. The diagnostic reference is the linkage position at the engine – not the control lever position at the helm.
Shift Cable and Linkage: Checks and Replacement
Cable Condition
The shift cable is exposed to salt, moisture, and vibration for the full length of its run from helm to engine. Internal corrosion stiffens the inner wire progressively and can prevent the linkage from reaching full travel even when the cable appears intact externally.
- Movement test: disconnect the cable at one end and move the inner wire by hand. It should travel smoothly with light resistance. Any binding, notchiness, or sticking indicates a cable that should be replaced.
- Free play at the end fittings: too much free play (slack) at the connection points means the cable moves before it drives the linkage. Too little free play means the cable is under tension even at idle and may hold the linkage short of full travel.
- Jacket inspection: inspect the full jacket for cracks, hard spots, or corrosion, particularly at bends and where the cable passes through any grommet or support.
- End fitting condition: a clevis pin, cotter pin, or retaining clip that is missing, loose, or corroded is a common source of lost motion that makes the cable seem longer than it is.
Cable Routing
A cable kinked, trapped, or routed around a tight bend adds friction that prevents the linkage from reaching full travel. If a cable was recently replaced and the shift is still stiff or short, confirm the routing follows the original path and meets the minimum bend radius for that cable design.
Linkage Inspection
- Pivot bushings: worn bushings allow the linkage to flex rather than transmit full motion. Replace worn bushings before adjusting cable position.
- Fastener tightness: all pivot bolts and fasteners should be snug. A loose pivot bolt is a very common source of lost or inconsistent motion.
- Bent or damaged components: any bracket, arm, or lever in the linkage that has been bent from impact changes geometry and travel. Do not straighten and reinstall bent components in the shift chain.
Control Box / Binnacle
If the cable is free by hand but the linkage is still short of full travel, the control box may have internal wear that prevents the cable from being driven to its full extent. Confirm by disconnecting the cable at both ends and operating the control – the cable end should move through its full manufacturer-specified range. If it doesn't, the control box is the fault.

Yamaha Outboard Gear-Shift Adjustment
Shift cable adjustment sets the neutral position and the travel distance for forward and reverse engagement. A correct adjustment keeps the engine-side linkage at full travel in both gear positions and returns cleanly to neutral when the control is centered.
One of the most common and most overlooked adjustment faults: a cable that is correct in one direction but 1–2 mm short in the other. The engine shifts cleanly into forward while reverse engages partially or not at all – or vice versa. The cable appears functional because one direction works.
Adjustment is model-specific – follow the service manual
The adjustment point location, neutral reference position, measurement method, and verification procedure vary by Yamaha model family, generation, and control system. Some models have alignment marks on the linkage; others use a measurement to the shift plate in neutral. Follow the service manual for your exact engine. Adjusting by feel or general guidance can produce a cable that is correct at the dock but fails under the higher load of engaging gear underway.

Yamaha Outboard Stuck in Forward Gear
Do not force the control lever or the linkage
Forcing a jammed shift system damages cable end fittings, bends linkage components, and can cause unexpected gear engagement. If the drive is stuck in gear and the boat is moving, reduce speed carefully and maneuver to a safe stop before inspecting anything.
The isolation sequence for a stuck-in-gear fault:
Disconnect the cable at the engine-side linkage following the service manual procedure for your model.
Try moving the engine-side linkage by hand. If it moves freely, the fault is upstream – in the cable, control box, adjustment, or connection. The engine-side linkage and lower unit are not the cause.
If the engine-side linkage is also stuck with the cable disconnected, the fault is in the engine-side linkage, shift rod, or internal lower unit. Do not apply additional force.
With the cable disconnected and the linkage moving freely, inspect the cable for a kink, bent fitting, or internal lock that prevents it from returning to neutral. A cable that drives in one direction but does not return is a common finding.
If all external components are free and the clutch is still engaged, the fault is internal and requires professional service.
Stalls When Shifted Into Gear
An engine that stalls the moment gear is engaged is not a shifting problem – it is an engine or drivetrain load problem. The shift system is working; the engine cannot handle the load of gear engagement.
Idle Quality First
Fix any idle fault before diagnosing the shift system. An engine already at or below minimum idle RPM has no margin for the momentary load increase of gear engagement. A rough, erratic, or low idle traces to fuel delivery, a dirty or failing injector, ignition, or carburetor (on carbureted models). Check idle quality and RPM against the model specification before assuming the shift system is at fault.
Throttle-Shift Synchronization
On most Yamaha outboards, the throttle and shift functions are mechanically linked so that the engine is at idle before gear engages – the cam system prevents early throttle input before the shifter has moved to the gear position. If this synchronization is out of adjustment, shifting can occur at an incorrect throttle position. The synchronization check procedure is in the service manual for your specific Yamaha model.
Propeller and Shaft Load
Fishing line wrapped around the propeller shaft creates drag that the engine cannot overcome at idle. Even a small amount of line creates resistance at engagement that stalls an otherwise healthy engine. Check the shaft area carefully – line can be wound tightly and is difficult to see.
Gearcase Binding
Abnormal resistance inside the gearcase – from a worn bearing, damaged gear, or debris – creates engagement load that stalls the engine before it can absorb it. If idle quality, synchronization, and propeller area all check out, professional gearcase inspection is the next step.
Vibration in Gear
Vibration in gear is distinct from a shifting failure – but it is frequently reported as a shifting problem and sometimes accompanies one. Match the vibration type before assuming a gearcase fault.
Vibration type / when |
Most likely cause |
First check |
Unbalance shudder – all speeds in gear |
Bent, chipped, or damaged propeller blade; out-of-balance prop |
Remove prop with engine off; inspect blades for asymmetric damage |
Drag with vibration |
Fishing line on prop shaft; debris in prop area |
Inspect shaft area carefully – wound line is hard to see |
RPM rises; speed doesn't – with vibration |
Failing or spun propeller hub |
Remove prop; inspect hub for rotational damage; prop shop test |
Growl or grinding character |
Internal gear or bearing damage; debris in gearcase |
Drain and inspect gear lube; check for metal debris on drain plug magnet |
Vibration at specific RPM range only |
Bent prop shaft (runout); resonance from loose engine mount |
Professional shaft runout measurement; inspect mount hardware |
Engine roughness in gear – follows RPM, not speed |
Engine misfire under load; ignition or fuel fault |
Check for fault codes (EFI); compare cylinder firing at idle vs under load |
Vibration from helm / steering |
Loose steering connection or mount rather than drivetrain |
Inspect steering linkage and engine mount hardware |
Inspect the propeller first – always
A damaged propeller can mimic gearcase vibration closely enough to lead the diagnosis in the wrong direction. Remove the propeller and inspect it before assuming internal lower unit damage. A propeller that looks intact from above can have a bent blade tip or edge damage that causes significant unbalance. A prop shop can measure runout precisely if visual inspection is unclear.
Gear Lube Check: What It Tells You
The gear lube condition reveals the state of the lower unit before any disassembly. Check it as part of any shifting diagnosis – the findings can either redirect you away from internal problems or confirm them before expensive teardown.
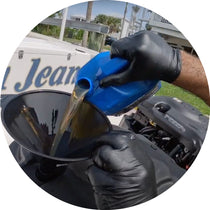
Step-by-step gear lube check:
With the engine off and the lower unit cooled, place a container below the drain plugs.
Remove the upper vent plug first, then the lower drain plug.
Allow oil to drain and collect in the container.
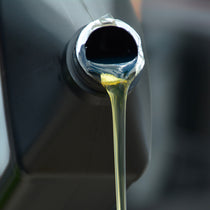
Note the color and consistency. Clear to dark gold or amber is normal. Gray or silver indicates water intrusion or wear particles. Milky white or cream indicates water – a serious finding requiring immediate seal inspection.
Inspect the drain plug magnet. A light coating of fine metallic paste is normal wear from break-in or long service. Chips, flakes, or excessive metal on the magnet indicate abnormal gear or bearing wear.
Confirm the oil quantity matches the capacity for your model. Low level indicates a leak.
Gear lube appearance |
What it indicates |
Action |
Clear to dark gold or amber |
Normal – oil is doing its job |
Change per service schedule if color is very dark |
Gray or silver tint |
Water contamination beginning, or fine wear particles elevated |
Investigate seal condition; re-check after seals are confirmed good |
Milky white or cream |
Significant water ingress – seal failure |
Do not operate engine; identify and replace failed seal(s) before returning to service |
Metallic glitter (fine) |
Normal wear – especially after extended service or break-in |
Normal if only a light coating; note and monitor |
Chips, needles, or flakes on magnet |
Abnormal gear or bearing wear |
Professional inspection required before further operation |
Low quantity – level below fill port |
External seal leak |
Find and repair seal; do not operate without correct fill level |
Yamaha gear lube specification
Yamaha specifies Yamaha Gear Lube (Regular or High-Performance) for their outboard lower units. The grade (Regular vs High-Performance) depends on the engine model and lower unit design – confirm in your service manual. Do not substitute automotive gear oil without confirming compatibility with Yamaha's seal materials.

Propeller and Hub Inspection
Propeller Inspection
Remove the propeller with the engine off and ignition disabled. With it in hand, inspect:
- Blades for bends, chips, missing material, and impact damage – including the leading and trailing edges and blade tips.
- The shaft area for wound fishing line. Line can be wrapped tightly enough to be nearly invisible; run a finger along the shaft forward of the prop to detect it.
- The hub barrel for rotational damage – scoring, spinning marks, or rubber debris from the hub insert.
Spun Hub Diagnosis
A spun hub allows the engine to rev freely while the propeller does not rotate at the same speed or at all under load. The symptom mimics a no-gear or weak-gear condition: engine revs climb above normal WOT range, boat speed is far lower than expected, and the fault appeared suddenly – often after a hard strike or extended high-throttle operation with a damaged prop.
How to confirm a spun hub: compare engine WOT RPM to boat speed. If RPM climbs well above the normal range while the boat barely accelerates, the hub is not transferring power. Remove the propeller and inspect the hub for rotational damage. A prop shop can confirm slip definitively and press a replacement hub insert if the blades are undamaged.


Shifting Problems After Lower-Unit or Impeller Service
A new shifting problem immediately after lower-unit removal and reinstallation is almost always a shift-rod alignment or reassembly error. Not a newly failed component – a component that was not correctly reinstalled.
The shift rod in the lower unit must be in a specific position relative to the midsection before the lower unit is slid back onto the engine. This position varies by Yamaha engine model and generation – there is no universal technique. Using a procedure from a different model or a forum recommendation risks incorrect alignment.
Return to the service manual – not forum guidance
The required gear position during lower-unit reinstallation, the method for confirming shift-rod alignment, and the pre-installation check procedure are specific to each Yamaha engine model. General guidance that works on one engine may produce a stuck or misaligned shift rod on another. Follow the exact procedure in the Yamaha service manual for your engine's model and year.
If the lower unit is already reinstalled and the shift is stuck or a gear is missing:
- The lower unit will typically need to come back off to confirm and correct shift-rod position.
- Before removing the lower unit, check all external linkage for disconnected components, missing fasteners, or incorrectly seated cables – these can produce identical symptoms and are faster to inspect.
- Do not repeatedly attempt to shift into gear if the rod may be misaligned – repeated grinding with a misaligned shift rod accelerates clutch dog wear.
When Internal Lower-Unit Repair Is Likely
Most Yamaha shifting problems resolve at the cable, linkage, or adjustment level. These signs point toward internal repair:
Indicator |
What it suggests |
Repeated grinding after cables, linkage, and adjustment are confirmed correct |
Clutch dog wear or internal alignment fault – not curable by external adjustment |
Metal chips, flakes, or needles on the drain plug magnet |
Abnormal gear or bearing wear – do not continue operating |
Milky or cream gear lube |
Water intrusion through a failed seal – seals must be replaced before further operation |
Propeller shaft runout beyond model specification (measured professionally) |
Bent shaft from an impact – requires shaft replacement |
Incomplete gear engagement with correct adjustment – prop turns but slips under load |
This is not a hub fault – if the hub is confirmed good, clutch dog wear is the likely cause |
Shift rod moves correctly but gear does not engage |
Internal clutch or shift mechanism disconnected inside the lower unit |
Impact (struck bottom, hard grounding, object strike) followed immediately by shifting problems |
Impact may have bent the prop shaft or damaged internal gear faces – inspect gear lube and prop shaft before further operation |
Internal gear, clutch, or bearing repairs require substantial lower-unit disassembly, specialized tools, model-specific measurements, and the correct service manual for the exact Yamaha engine model and year. An authorized Yamaha marine dealer or Yamaha-trained marine technician is the appropriate resource for this work.
Preventive Maintenance: What Keeps the Shift System Working
Item |
Interval |
Why it matters |
Shift cable inspection |
Annually |
Catch jacket cracking and inner wire stiffness before cable fails at sea |
Shift cable replacement |
Every 3–5 years or at first stiffness |
Cables degrade gradually; replace on a schedule, not after failure |
Linkage pivot lubrication |
Annually |
Corroded pivots add resistance that causes partial travel and hard shifting |
Gear lube change |
Every 100 hours or annually |
Removes water and wear particles; confirms seal integrity before each season |
Gear lube level check |
Before every extended trip |
Low level indicates a seal leak – catch it before the bearings run dry |
Propeller inspection |
Start of each season and after any impact |
Damage accumulates; early detection prevents unbalance damage to the shaft and bearings |
Throttle-shift synchronization check |
Every 2 years or if shifting becomes inconsistent |
Out-of-sync cam can cause stalling on engagement or early throttle advance |
Post-service shift function test |
After any lower-unit or shift-system work |
Confirms reassembly before returning to service – catches errors at the dock |
Finding the Fault and Getting Back on the Water
Most Yamaha outboard shifting problems are found before you reach the lower unit. Start at the helm and work toward the engine: confirm the cable moves the linkage, confirm the linkage reaches full travel in both directions, confirm the shift rod is correctly positioned, and check the propeller hub before concluding the gearcase has failed.
A no-gear problem that appeared immediately after service is almost always a shift-rod position error – return to the service manual reassembly procedure before anything else. A stalling problem points to idle quality and throttle synchronization, not the shift system. A vibration problem starts with the propeller and hub, not the gearcase.
PartsVu carries Yamaha shift cables, clevis pins, pivot bushings, control box components, propellers, hub kits, water pump kits, gear lubricant, lower unit seals, and model-specific lower unit service parts.
Frequently Asked Questions
Why won't my Yamaha outboard go into gear?
A Yamaha that won't engage gear almost always has a fault in the first three links of the shift chain: the cable not reaching full travel at the engine-side linkage, an adjustment that is short in one direction, or a missing or corroded fastener at the connection point. Watch the engine-side linkage travel when you operate the control – if it reaches full travel in both directions and the engine still won't engage, the fault is in the shift rod position or the lower unit.
Why is my Yamaha outboard stuck in forward gear?
Disconnect the shift cable at the engine-side linkage following the service manual procedure. If the linkage then moves freely by hand, the fault is in the cable, control box, or connection – not the lower unit. If the linkage is also stuck with the cable disconnected, the fault is in the engine-side linkage, shift rod, or internal lower unit. Do not force the control lever against a jammed system.
How do I adjust the shift cable on a Yamaha outboard?
Shift cable adjustment sets the neutral position and the travel distance for forward and reverse. The adjustment point, neutral reference position, and verification method vary by Yamaha engine model and generation – confirm in the service manual for your exact engine. A correctly adjusted cable keeps the linkage at full travel in both gear positions and returns cleanly to neutral when the control is centered.
Why does my Yamaha outboard stall when I put it in gear?
Stalling when shifting is almost always an idle quality or throttle-shift synchronization problem – not a shift fault. An engine already at or below minimum idle RPM has no margin for the load of gear engagement. Confirm idle speed and quality against the model specification before any shift diagnosis. Also inspect the prop area for wrapped fishing line, which adds engagement load that stalls a borderline idle.
Can a spun propeller hub cause a no-gear symptom?
Yes – a spun hub allows the engine to rev freely while the propeller does not rotate under load, which looks exactly like a no-gear condition from the helm. The distinction is RPM: a spun hub causes the engine to exceed its normal WOT range while the boat barely accelerates. Remove the propeller and inspect the hub barrel for rotational damage. A prop shop can confirm slip definitively.
My Yamaha shifts fine in one direction but not the other – what's wrong?
Shift cable adjustment is the most likely cause. A cable that is correct in one direction but 1–2 mm short in the other keeps the linkage from reaching full travel for that gear. The engine shifts cleanly into forward while reverse engages partially or not at all – or vice versa. Confirm the linkage reaches full travel in both positions; if one direction is consistently short, adjust the cable following the service manual procedure for your model.
Can lower-unit service cause new shifting problems?
Yes – it is the most common cause of a no-gear problem that appears immediately after impeller or lower-unit work. The shift rod must be in a specific position relative to the midsection before the lower unit is reinstalled. The correct position varies by Yamaha engine model; using the wrong procedure or a general technique produces misalignment. Return to the exact reassembly procedure in the Yamaha service manual for your engine before anything else.
What does milky gear lube mean on a Yamaha outboard?
Milky or cream-colored gear lube indicates water has entered the lower unit through a failed seal – prop shaft seal, drain plug O-ring, or a seal around a gear housing cavity. Do not continue operating the engine until the failed seal is identified and replaced. Operating with water-contaminated gear lube accelerates bearing and gear wear severely. Drain, identify the entry point, replace the seals, and refill with fresh Yamaha gear lube.
When does a Yamaha shifting problem need a dealer?
Take the boat to an authorized Yamaha dealer or Yamaha-trained technician when: the fault is on a DTS or Helm Master EX equipped engine (requires dealer diagnostic tools); repeated grinding continues after cables and adjustment are confirmed correct; metal chips or milky gear lube are found; the prop shaft has runout beyond model specification; or incomplete gear engagement persists after correct adjustment. Internal gear, clutch, or bearing repairs require the model-specific service manual and specialized tools.